The story of the Ten Year Storm is the first of the "Chapters of Fish Wrangler", released June 21, 2012.
Progress through the story will eventually lead to Doom Island, the first new area in Farovia in two years. You can view your progress by going to My Profile -> Ten Year Storm, and next steps will be displayed on the main fishing page.
Chapter #1: Hanging on for Dear Life[]
This chapter is unlocked by traveling to Misty Cliffs in Farovia, then shuttling to Roperia.
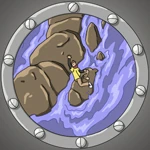
As I shuttled through the fog of Misty Cliffs, I noticed what looked like a person clinging to the jagged rocks at the ocean's end.
Everyone knows that Misty Cliffs is one of the most dangerous locations in Farovia. Someone was clearly in danger! As much as I wanted to keep fishing for the day, I decided to be a responsible wrangler and check out the situation!
I almost forgot to say! I guess Betsy Lou is handing out daily rations of these new Frozen Foods at The Sand Bar and Gill, I should probably start stocking up on those now!
Once arriving in Roperia, a note appears from the Ancient Mariner:
You spotted someone below as you shuttled over Misty Cliffs!
"Hurry up and look for the stranded sailor, he seems in danger!" -The Ancient Mariner
The wrangler is presented with a "Go Searching Now" button, indicating a ~1 day hike to sailor's location.
Clicking the button starts a search for the sailor:
You'll be reaching the stranded sailor in X hours Y minutes!
After spotting a stranded sailor on the rocks of Misty Cliffs, I ventured out in search of him.
I should be arriving in X hours Y minutes. I wonder what he has to say!
TIP: You can still travel and go night fishing now, and come back in X hours Y minutes.
Clicking the "Go Searching Now" button does not prevent you from fishing, traveling, etc during the "search". Also, the time required seems to vary for different wranglers. One theory is that the search ends at a particular time FVT each day. Based on one report, it may be 8pm FVT. So if a wrangler starts the search in the morning, they have to wait 12+ hours, while starting in the evening would be less.
Once a wrangler reaches the stranded sailor, Chapter 2 is unlocked.
Chapter #2 Stranded Sailor[]
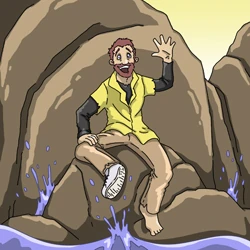
“My name is Stu! I'm a treasure hunter from Sans Culpra.”
“I was crusing through the Stormy Straight, passing what I thought was the fog of Misty Cliffs and it turned out to be one of the worst storms I've ever seen. I lost everything and ended up here 2 weeks ago, you may have read about me in the Fish Wrangler news posts?”
“Anyways, I really need to find sail boat.. it's very expensive and has my secret treasure map on board. I'll reward you dearly, if you can help!” -Stu the Stranded Sailor
You're heavily winded from your trek here.. and are unsure about this strange man. Your mind shall be clear in X hours Y minute.
Chapter #3 Storm Supplies[]
Since I don't want the same fate as Sailor Stu, he asked me to stock up on various supplies which will come in handy during my trip. Safety comes first!
I'm searching for the Three F's: Fog Light, Food Packs, and Flare Gun. The list may sound short and simple, but I need to deal with Earl in Waterport... and we all know that we're not the best of friends. Especially after I steal the fog light he's been working on for ages. Oh well, a wranglers gotta do what wranglers gotta do!
"Get the following provisions and we can head out!" -Stu the Wishfull Sailor "Stock up with the following goods, in case we run into trouble while passing the Stormy Straights..." -Stu the Duude
Pick up the following:
- (1) Clean Pair of Underwear (EQUIPPED!)
- (1) Long Distance Flare Gun (Go to Earl's in Waterport to pick this up!)
- (1) High Strength Fog Light (Steal this from Earl's in Waterport)
- (3) Frozen Food Packages (Receive these from Betsy Lou at the Sand Bar and Grill)
The long distance Flare gun can be purchased from Earl for 100,000 gold and 30 shells.
The Fog Light is stolen from Earl at his shop.
The Frozen Food Packages are obtained every 24 hours from Betsy.
Once all the supplies are gathered, a button appears to travel to Doom Island. The trip takes 1 hour.
Chapter #4: Bon Voyage[]
This chapter unlocks after gathering the supplies for Chapter 3
After several days of stocking my Alcatraz, I finally started my voyage to locate the Storm & Stu's Sailboat. The Ten Year Storm must have intensified because the fog thickened as I approached the border of Farovia and Roperia. I'd be lying if I said I wasn't nervous... I had no idea of my whereabouts, nor was I prepared for what laid in front of me.
Chapter #5: Stranded At Sea[]
This chapter unlocks after choosing to travel to Doom Island
The fog thickened to zero visibility when my absolute worst nightmare occured: a tidal wave crashed atop my Alcatraz Crusier. Similar in height to a Santa Fransesca skyscraper, the enormous wave capsized my boat within seconds... leaving me completely stranded at sea. Panic set in when strange fish approached me - one breed looked like a Miny Fish on Steroids - so I quickly began paddling towards a landmark I could faintly see in the distance. After hours of endless swimming, I nearly lost consciousness when a mysterious man came to my rescue. Mousso brought me back to his home, Doom Island, where he built me a pole so I can continue my adventure!
Chapter #6: Mousso Goes to the Rescue[]
This chapter unlocks after completing Mousso's first task
I've proved my wrangling abilities to Mousso by completing his difficult fish task, so he has agreed to locate my capsized Alcatraz Cruiser and expects to return in three days.
In the meantime, Mousso said I can borrow his Makeshift Dinghy to travel back to Farovia and Roperia, which is great because my family and friends haven't heard from me in almost a week - everyone must be worried about my safety!
Chapter #7: Alcatraz Acquisition[]
This chapter unlocks after the three day wait for Mousso to return with your Alcatraz. There will be a "Check on Alcatraz" link on the main fishing page. Clicking that will drain all remaining Fresh Water (Mousso was very dehydrated), and your boat list will repopulate:
Three days had passed and Mousso was missing. I was really starting to worry about him because the storm has intensified since he departed Doom Island. Just when I was about to sound the flare gun to seek help from the Coastguards, I witnessed a very weak-looking Mousso in the distance with my Alcatraz Cruiser!
With his unclear dialect, Mousso explained the various obstacles experienced at sea and how he ran out of fresh water on the 2nd day. I'm quite certain that anyone else would have perished on this journey...but leave it to Mighty Mousso to return safely!I couldn't be happier to receive my Alcatraz Cruiser - Mousso's Makeshift Dinghy is worse than the Beat-up Dinghy in Waterport. Shhh.. don't tell the old man, I don't want to hurt his feelings!
Chapter #8: Widocto War[]
Very little can scare Mousso, who has lived on Doom Island since a young age, except one creature that repeatedly haunts him in nightmares: the Vampiric Widocto Fish. Turns out, this blood-sucking breed is my obstacle to advancing closer to the eye of the storm!
Mousso agreed that if I remove several dozen Vampiric Widoctos from Doom Island, then he will show me the path towards the dangerous waters of Stormy Straight. After several days of brutal battle, I've proudly accomplished the task! Soon I'll upgrade my pole and prepare for the next chapter!
You will need to complete Mousso's Second Task which unlocks Stormy Straight in order to reach the next chapter.
Chapter #9: Lost Explorers[]
This chapter unlocks upon catching the floating bottle in Stormy Straight.
Upon receiving my heavy-duty Anchor from Mousso, I immediately embarked on the treacherous voyage through the Stormy Straight. I was very nervous about taking the next step through the Ten Year Storm, especially after my recent near-death experience with a tidal wave, but I successfully arrived and anchored up to weather buoy.
After a quick introduction with the local fish, I spotted a floating bottle that carried a very important map and message from fellow explorers. They explained how the weather monitor broke during their expedition...but they were nonetheless going to attempt to head into the Eye of the Storm.If these explorers made it out alive, they would have made headlines news throughout Farovia and Roperia. Clearly something went really wrong!
I must not have the same fate as these unfortunate souls. Inscribed on the broken weather monitor is a stamp of “Waterport Weather Services” - I'll head to Waterport and search for clues on fixing this critical device.
![]() Next: The message in a bottle I found from the lost explorers, shows their demise was the broken weather buoy! The Farovian Weather Service team will help me repair it, if I bring them some of their favorite Ten Year Storm food! Hand in the Party Platter, BBQ Bunny, or Fried Flocktopus Quests until they're happy! (Check status?)
Next: The message in a bottle I found from the lost explorers, shows their demise was the broken weather buoy! The Farovian Weather Service team will help me repair it, if I bring them some of their favorite Ten Year Storm food! Hand in the Party Platter, BBQ Bunny, or Fried Flocktopus Quests until they're happy! (Check status?)
Broken Weather Monitor
You will also receive a header at top which you can only hide for 1 hour at a time.
“Keep cookin' us those Ten Year Storm delicacies!” -Waterport Weather Service Team
“We really like that food where you need that monitor fixed, so bring us some tasty dishes from Stormy Straight. We'll help you fix that broken weather buoy once we're filled.” -The Hungry Waterport Weather Service Gang
Note: Upon handing in each dish to Betsy-Lou, you'll automatically hand over the dish and be notified when the Weather Service Team is satisfied. (after the third one)
To unlock the next chapter, you must complete the level 30 Nail Fly / Palm Spear / Kelp Net Quest until you ease the hunger of the Waterport Weather Services enough for them to agree to fix the weather monitor. This involves finishing any combination of the level 30 quests above three times and then returning to the Sand Bar and Gill.
Chapter #10: Waterport Weather Services[]
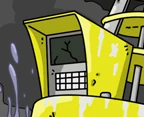
After doing some detective work in Waterport, I ended up on the front steps of the run-down Waterport Weather Services located down the block from Betsyslou's Sand Bar & Gill Restaurant. I explained to the employees how I needed to fix the broken weather monitor in order to make progress in the Ten Year Storm. They were willing help, but with one catch (well, actually...several catches): they love the tasty fish from Stormy Straight, so I must bring several dishes to them.
I fished like a maniac over the next few days and made several “fish deliveries” to Waterport Weather Services. Finally I earned the employees' trust...they agreed to fix my Weather Buoy for a hefty gold quantity.
A message will also show on your screen indicating the following:


Weather Monitor
I can purchase the Weather Monitor now!
The Farovian Weather Service guys will help me repair the buoy now! Unlocked Chapter#10: WATERPORT WEATHER SERVICES - Fish Deliveries to employees at WWS!
Chapter #11: Deliberation[]
A message will now show on your screen indicating the next step.
“Fix the Stormy Straight Buoy with this new Weather Monitor!” -The Cruel Waterport Weather Service Team (hide for 1 hour?)
“Those were some great dishes you cooked up for us! We weren't so sure about you at first, but you turned out to be a pretty good intern. We'll sell the Weather Monitor for some gold and call it even.” - The Well Fed Waterport Weather Service Gang
You'll have to wait an hour before you can make your choice. You can go wherever, but when you make your decision you have to return to WaterPort.
After unlocking this chapter you'll get the following for the Ten Year Storm log:
After cooking up a bunch of Ten Year Storm dishes, I was given the option to buy or steal the weather monitor. I spent about an hour deliberating...
Chapter #12: Buy or Steal[]
NOTE: IT IS EASIER TO PAY THE 100K GOLD - OTHERWISE YOU CLICK 3 LINKS TO 'GET AWAY' AND END UP PAYING A DONATION OF 100K.
After making your decision, you'll get the following message:


Paid up and ready to go!
Purchased the Weather Monitor to fix the damaged Stormy Straight weather buoy! You must be a very nice person!
Gold is a precious commodity these days...and I'm not sure whether I want to hand over a lumpsum to the Waterport Weather Services. In all honesty, these employees weren't easy to deal with - they had me running back and forth with fish deliveries! Should I hand over the 100k gold? Or seek revenge and steal the device? The pier is only a block away...I can be in my boat and headed to the open sea within minutes, but I have heard some rumors about patrolling Coast Guards. To buy, or not to buy, that is the question.
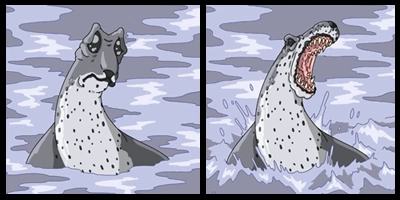
Chapter #13: Sassafras the Seal[]
After buying the pole upgrade for 500k gold, you will unlock this log entry:

After fixing up the Weather Monitor and upgrading my fishing pole, the local sea life isn't too happy - specifically “Sassafras” - the Seal of Stormy Straight. Mousso warned me about this little guy...Sassafras may look like an innocent seal stuck in the Ten Year Storm, but he really likes the taste of fresh water, and can turn vicious when thirsty. I'll certainly be watching my back...because a seal sure isn't stealing from me!
![]() Next: Mousso's next task appears to be something with a bra or a bikini. Any ideas on where I can find that? I'm still not sure, Mousso's very hard to understand. I'll try to get more details from him, but he just left on a day-long spiritual walk in the jungle. Check back in ~1 day.
Next: Mousso's next task appears to be something with a bra or a bikini. Any ideas on where I can find that? I'm still not sure, Mousso's very hard to understand. I'll try to get more details from him, but he just left on a day-long spiritual walk in the jungle. Check back in ~1 day.
Chapter #14: Bikini Bonanza[]
Complete Mousso's third task: Find a Bikini or something, more info at Beach Hut. You may also have to feed water to the Sassafras (click Sass! to use 10%) if it is stealing your catches.
I simply couldn't handle another strike from Sassafras, so I decided to visit Mousso to see if he could construct a better water device with seal protection. Since I have difficulty understanding his local lingo, Mousso drew a picture on a wooden plank - I struggled at first - but then I recognized that the image was a bikini top. Only one breed bares a bikini: the Bay Fish of Fishertonville!
I was unsure why a bikini was necessary, but I couldn't ask any questions...thus I headed to the palm tree land of Fishertonville to search for the item. Unsure of how to get the attention of the Bay Fish, I came up with the idea to “fake drown” in hopes that she'd rescue me (we all know that I nearly drowned in the Ten Year Storm, so I had plenty of real life experience to act the part). My master plan worked and I successfully retrieved the Bay's bikini!I'm sure my photo & story is all over the newspapers in Farovia, but who cares - all that matters is that I found the required item for Mousso! I'd do anything for him...the man saved my life! Let's hope Mousso can quickly build a new device, because I can't handle Sassafras stealing anymore of my fresh water.
![]() Next: It appears Mousso was not looking for a bikini, but rather 200 lb's of the Loopy Liger to receive the salt water desalinator and access to the Eye of the Storm - I think he's worried I'll be away for awhile! *tear*
Next: It appears Mousso was not looking for a bikini, but rather 200 lb's of the Loopy Liger to receive the salt water desalinator and access to the Eye of the Storm - I think he's worried I'll be away for awhile! *tear*
Chapter #15: Loopy Liquidation[]
Finishing the Loopy Liger task for Beach Hut will unlock this log:
I beamed with pride as I brought the bikini back to Stormy Straight...but Mousso took one look at the article and shuck his head in disapproval.
Mousso redid the sketch and everything made sense: he's drawing the Loopy Liger! DUH! What was I thinking? Why would Mousso ever need a bikini? And now my face is plastered all over the media as “the wrangler who attacked the Bay Fish...” I suppose I should be grateful that I'm in the middle of nowhere...away from law enforcement and the public's eye.Mousso inarticulately explained that if I bring him several dozen Loopy Ligers, then he will build a special Water Desalinator for the Eye of the Storm (which he promised is larger in size and seal-proof). I'm still trying to understand the Loopy Liger connection, but I'm pretty sure that Mousso likes the “loopy” effect that occurs when consuming the fish. He certainly is a strange man...
![]() Next: Travel to the Eye of the Storm and fish several times in a row to get your bearings in this volatile location!
Next: Travel to the Eye of the Storm and fish several times in a row to get your bearings in this volatile location!
Chapter #16: The Eye of the Storm[]
- For more information on unlocking chapters 16-20, see [[Eye of the Storm Spoiler Tutorial]].
Weeks of catching Ligers have paid off, because I finally advanced to the Eye of the Storm with my promising Desalinator Bag. I couldn't have been happier to say good-bye to Sass...although I know she'll miss me and my water supply!
I started to get my senses in this new location when I noticed a strong current beneath us. Stu tried to reassure me that we were safe...but my instinct told me otherwise.Just then, the storm intensified and we started losing control. Flashbacks quickly returned of my previous tidal wave encounter, and all I could do was hold on for my dear life! Several minutes passed before I realized my whereabouts...we were washed out to sea, approximately 2 nautical miles from the Eye of the Storm, and Stu wasn't with me! Oh no...this poor sailor was already stranded here once!
I start frantically searching for Stu when I notice something floating in the distance. I immediately reel in the item and am surprised to find an mysterious coin - which appears to be over a hundred years old. I remember learning in my history classes about a secret sea spot that's scattered with rare artifacts from Waterport's early days. Could this be the location?
Unsure of what to do next, I visit Mousso to find out more about the weather patterns in the Eye of the Storm, and he explains how the center “eye” is always moving, and if I don't stay in the middle of it, then I run the risk of danger (ie: what I just experienced). Mousso said to pay attention to the “Weather Status” meter & asked if I'm interested in a Personal Storm Radar System...
Chapter #17: Communication is Key[]
This chapter unlocks after completing Mousso's Fourth Task.
I can't handle another run-in with the storm, so I gladly accepted Mousso's offer to build me a Personal Storm Radar device to ensure that I maintain my position in the Eye of the Storm. The catch? 40 Communication Crabs!
In the meantime, Mousso said to visit the Weather Monitor in Stormy Straight whenever I see my weather meter turn red. If I neglect the meter's warning, I run the risk of being swept out to sea...where I'll lose my precious gold, but on the positive side: I will have a chance at discovering a rare Waterport collectable. Hmm...decisions, decisions!I better head out to the Eye of the Storm and start catching these Communication Crabs!
Chapter #18: Pirates Ahoy[]
I headed to Doom Island to retrieve my Personal Storm Radar and Mousso had some breaking news: Stu has been taken hostage by a clan of pirates! Apparently, the pirates discovered Stu floating near the Stormy Straight and quickly found out about his secret treasure map. The pirates forced Stu aboard to search for his luxurious sailboat trapped in the Eye of the Storm.
Mousso watched the exchange from his hut on Doom Island and couldn't believe what he was seeing. Poor Stu...he's been living a nightmare for months! In a desperate plea, Mousso cried to the clan to release our dear friend, and after hours of negotiating, the pirates agreed to free Stu for an exchange of several items.
![]() Next: Complete Task Five: capture the pirates' lost parrot in Doom Island, feed Sass tarpits in Stormy Straights so she'll hand over the keg of rum! Then hand these items over to the pirates in exchange for Stu - who they've been holding hostage!
Next: Complete Task Five: capture the pirates' lost parrot in Doom Island, feed Sass tarpits in Stormy Straights so she'll hand over the keg of rum! Then hand these items over to the pirates in exchange for Stu - who they've been holding hostage!
Chapter #19: Stu is Safe[]
I never> expected to run into pirates during this Ten Year Storm adventure! I've always heard that Parribean pirates are the meanest at sea, but I beg to differ after my recent experience. This clan was relentless with their orders and had me running all over the place!
You should have seen the complications in finding their lost parrot. Is it my fault the parrot preferred living in the palm trees of Doom Island? I don't blame the bird...I'd probably run away too if I lived on a ship with those mean pirates!
Next, I had to confront Sass again. The seal nearly killed me when she realized I didn't have fresh water! Can you guess who reaction when she realized I was stealing a keg of rum? And then I had to locate the Sea Trinicorn and the Captain's wooden leg...I don't even want to talk about it. My experience with the pirates wasn't good.
Fortunately, at the end of these obstacles, the pirates held up their end of the bargain and released Stu! He looked a bit disheveled with a few bad bruises and parrot poops on his shoulder, but he seemed so relieved to see me!
Once the clan went on their way, Stu explained how the pirates were unsuccessful in finding his luxurious sailboat that holds his prized treasure map. He's nearly certain where the boat lies in the Eye of the Storm...there's only one problem: it's guarded by the Reigning Deity Fish.
The Reigning Deity is often considered the foundation of the Ten Year Storm, as the fish's counterparts represent the forces of Farovia and Roperia. It'll be a battle to get passed this pack of Reigning Deity, but we're so close to the end of the Ten Year Storm!
![]() Next: Catch and remove the 3 Reigning Deity Fish that are guarding Stu's sail boat!
Next: Catch and remove the 3 Reigning Deity Fish that are guarding Stu's sail boat!
Chapter #20: The Storm Strikes[]
After days of intense battle, I caught the final Reigning Deity and finally gained access to Stu's Sailboat. We were moments from completing our mission when an absolute catastrophe occurred before our startling eyes: the Pirates were hopping aboard the Sailboat.
We sat in utter disbelief...all this hard work has come to this?!? Stu wanted to sneak on board to retrieve his treasure map, but I knew we didn't have a chance.
The pirates started the celebration by singing “Yo Ho Ho and A Bottle of Rum” which led to the opening of their newly-acquired “keg of rum” (compliments of Sass & me). They must have been three sheets to the wind, because the rum sprayed all over the place. Stu was nearly in tears...his prized possession was getting destroyed by a clan of pirates!
The Captain started up the engines and the pirate ship & Stu's sailboat headed out of the Eye of the Storm.
Maybe it was pure coincidence, or perhaps the force of the fish in the Ten Year Storm, or just karma...but just as the pirates were nearing the horizon, a bolt of lightning struck like we haven't seen before! The pirates were hit, and thanks to the spilled rum, the fire ran rampant and the boats burst into flames.
Within minutes, both boats sunk. Vanished. Yet another victim of the Ten Year Storm.
I glance over at Stu, expecting him to be flabbergasted at the recent spectacle, but he's looking at me with those opportunistic eyes. I know what he's thinking right away...let's get our scuba gear and head over to the shipwreck.
Am I ready for the next adventure?
![]() Next: After witnessing the Pirates blow up Stu's sailboat, Stu came up with a brilliant idea for getting closer to the tragic scene. Stu's NEW IDEA: Go scuba fishing with the Spear Gun in the Eye of the Storm and try to find it underwater!
Next: After witnessing the Pirates blow up Stu's sailboat, Stu came up with a brilliant idea for getting closer to the tragic scene. Stu's NEW IDEA: Go scuba fishing with the Spear Gun in the Eye of the Storm and try to find it underwater!
Note: Doing the next will unlock the next island location of SS Whiskey. For more please see the spoiler tutorial of Shipwreck Explorer story.