(Fixed broken & oak SBQ links too) |
(→Last Catch Boost: Note using Digloo Brew resource) Tag: Visual edit |
||
| (43 intermediate revisions by 7 users not shown) | |||
| Line 1: | Line 1: | ||
| − | [[Image:The-sand-bar-and-gill.gif|right|300px]] |
||
| − | [[Image:the-wave-bar-and-grill.gif|right|300px]] |
||
==General Quest Info== |
==General Quest Info== |
||
The base storyline is the same whether you're in Farovia or Roperia. |
The base storyline is the same whether you're in Farovia or Roperia. |
||
| + | ===Farovia=== |
||
| + | Complete a quest either individually or with a friend. When you complete the catch requirements for a quest, go back to respective Quest area location to drop them off for your dish. |
||
| + | There are currently 3 locations to turn in quests for Farovia. ''The Sand - Bar and Grill!'' in WaterPort for most Quests. ''The Chataeu D'Amour'' in Lover's Lake for all Reelistic pole quests for Big Love Islands. And ''Farovian Air and Space Team'' in Fishertonville for all Dirigible / Mission Recovery pole quests. But you can also turn in any of the quests at any of the quest turn-in locations, not only the corresponding ones, it will still be accepted. |
||
| − | === Farovia - The Sand - Bar and Grill=== |
||
| + | [[Image:The-sand-bar-and-gill.gif|right|300px]] |
||
| − | Earl's lovely wife BetsyLou recently inherited a family restaurant and she needs help in preparing dishes for her restaurant, '''The''' '''Sand - Bar and Grill!''', located in [[WaterPort]] |
||
| + | ====The Sand - Bar and Grill==== |
||
| + | Earl's lovely wife BetsyLou recently inherited a family restaurant and she needs help in preparing dishes for her restaurant, '''The Sand - Bar and Grill!''', located in [[WaterPort]] |
||
BetsyLou inherited this restaurant from her ex-husband Gumbo Gary who passed away in a tragic shark wrangling accident last week. BetsyLou is in dire need of help creating some new dishes for her new inheritance and wranglers can help in completing ''quests''. Each quest you complete is another dish that's served at this lovely new place in WaterPort. |
BetsyLou inherited this restaurant from her ex-husband Gumbo Gary who passed away in a tragic shark wrangling accident last week. BetsyLou is in dire need of help creating some new dishes for her new inheritance and wranglers can help in completing ''quests''. Each quest you complete is another dish that's served at this lovely new place in WaterPort. |
||
| Line 15: | Line 17: | ||
Complete a quest either individually or with a friend. When you complete the catch requirements for a quest, go back to The Sand - Bar and Gill! to drop them off for your dish. |
Complete a quest either individually or with a friend. When you complete the catch requirements for a quest, go back to The Sand - Bar and Gill! to drop them off for your dish. |
||
| − | ===Roperia - The Wave Bar and Grill=== |
||
| + | [[Image:Chataeu-d-amour.gif|right|200px]] |
||
| + | ====The Chataeu D'Amour==== |
||
| + | Wranglers turn in all Big Love Island quests for the [[Reelistic]] pole at [https://fish-wrangler.com/fishwrangler/restaurant The Chataeu D'Amour] in [[Lover's Lake]] instead of traveling to the distant ''The Sand - Bar and Grill'' restaurant in WaterPort. |
||
| + | |||
| + | Offering 'fine farovian dining' run by Chef Wolfie, ''The Chataeu D'Amour'' is a little bit American West, a little bit French, this fancy hotel is built on a rise between the river and the lake. Newlyweds love the luxurious amenities and gorgeous views. Bonjour, pardner! |
||
| + | |||
| + | [[Image:1-wolfie.jpg|left|150px]] |
||
| + | Chef Wolfie moved from Southern France to take over the hotel in Lover's Lake and needs help cooking some dishes at his place: Chataeu D'Amour!<br /> |
||
| + | |||
| + | |||
| + | |||
| + | |||
| + | [[Image:Fast.gif|right|180px]] |
||
| + | ====Farovian Air and Space Team - Fishertonville Hangar==== |
||
| + | The FAST (Farovian Air and Space Team) as it is known as, is located at an old unused hangar within [[Fishertonville]] where wranglers will find a fishing shop that stocks all the poles and flying chum they'll need for their fishing adventure across the skies. It is also where wranglers turn in [[Dirigible]] / [[Mission Recovery]] pole quests at ''Farovian Air and Space Team'' in Fishertonville. |
||
| + | |||
| + | [[Image:Jenny.jpg|left|150px]] |
||
| + | Jenny (Deckhand Dex's cousin) is the chapter president of the Farovian Air and Space Team, based out of Fishertonville. She needs help catching the flying fish of Monsoon Lagoon! When you complete the catch requirements for a quest, come back here to drop them off for your dish. |
||
| + | |||
| + | |||
| + | ===Roperia=== |
||
| + | Complete a quest either individually or with a friend. When you complete the catch requirements for a quest, go back to respective Quest area location to drop them off for your dish. |
||
| + | |||
| + | There are currently 2 locations to turn in quests for Roperia. ''The Wave Bar and Grill'' in Santa Francesca for all Roperian quests except for Icelantica Backside pole quests. And ''RUSSOQ Headquarters'' in Glacier Shack for all Icelantica Backside pole quests. |
||
| + | |||
| + | [[Image:the-wave-bar-and-grill.gif|right|300px]] |
||
| + | ====The Wave Bar and Grill==== |
||
Frank's wife RubyMae recently inherited a family restaurant in [[Santa Francesca]] and needs help cooking some dishes at her place: '''The Wave - Bar and Grill!''' |
Frank's wife RubyMae recently inherited a family restaurant in [[Santa Francesca]] and needs help cooking some dishes at her place: '''The Wave - Bar and Grill!''' |
||
| Line 22: | Line 50: | ||
Complete a quest either individually or with a friend. When you complete the catch requirements for a quest, go back to The Wave - Bar and Gill! to drop them off for your dish. |
Complete a quest either individually or with a friend. When you complete the catch requirements for a quest, go back to The Wave - Bar and Gill! to drop them off for your dish. |
||
| + | |||
| + | |||
| + | ====RUSSOQ Headquarters==== |
||
| + | Wranglers turn in all [[Cold Fusion]] and [[Holy Hybrid]] pole quests at ''RUSSOQ Headquarters'' in [[Glacier Shack]]. |
||
| + | Needs info. |
||
==The Quests== |
==The Quests== |
||
| Line 29: | Line 62: | ||
Completing some quests unlock an addon for that pole, which you can obtain once completing the quest and maxing out the pole. Each addon unlocks another 10 levels to add to your pole, and allows you to begin catching the Augmented Fish (there are at least four fish per pole at levels 57, 64, 73 and 80 - some poles may introduce more fish). |
Completing some quests unlock an addon for that pole, which you can obtain once completing the quest and maxing out the pole. Each addon unlocks another 10 levels to add to your pole, and allows you to begin catching the Augmented Fish (there are at least four fish per pole at levels 57, 64, 73 and 80 - some poles may introduce more fish). |
||
| − | The final quest does not unlock anything, but wranglers completing the final dish are awarded the rare [[Resources#Liquid_Gold |Liquid Gold]] attractant by the Ancient Mariner as a reward for their dedication to the task. |
+ | The final quest does not unlock anything, but wranglers completing the final dish are awarded the rare [[Resources#Liquid_Gold |Liquid Gold]] attractant by the Ancient Mariner as a reward for their dedication to the task. You are also rewarded a Trophy Dish prize for completing that poles entire quest set. |
| + | |||
| + | Most Island areas will also have a SBQ (Super Bonus Quests) which usually require using all the poles for those Island areas and require having completed their respective poles entire Quest Set. For example WaterPort SBQ requires having completed all Oak Branch, Broken Standard and Fancy Rifle poles quest set before unlocking, plus the fish catch requirements include fish for all poles. Once unlocked, in order to start a SBQ requires the use of gold and resources. Clicking to start a SBQ ''will'' prompt advising what all gold and resources will be used to start, and you must click confirm to actually start it if you have all the necessary amounts. Completing a SBQ rewards [[Free Love Chum]] and various other bonuses, such as [[Liquid Gold]], [[Resources#Mystery_Tackle_Box|MTB]], [[Resources#Mystery_Tackle_Box|MTB]], [[Resources#Deckhand_Voucher|Deckhand Voucher]], [[Resources#Red_Shark|Red Shark]], and/or [[Tarpit Stout]]. If that SBQ rewards [[Liquid Gold]], upon completing it for the first time usually rewards either 2 or 3 LG. Any additional times completed will give 1 less. Please see the quest section [[Quests#Why_didn.27t_I_receive_Liquid_Gold_when_completing_the_final_quest.3F|FAQ LG]] below for more info on LG rewards. |
||
| + | {{for|more details on this topic|List of SBQ}} or in-game [https://fish-wrangler.com/fishwrangler/quest/sbq SBQ List] |
||
Each pole's menu is listed below. Tips to complete each quest are provided on every dish. |
Each pole's menu is listed below. Tips to complete each quest are provided on every dish. |
||
| + | |||
| + | (Note: Thanksgiving Bonus quest will appear in Roperia section, as you need those poles first before starting. An add to Broken Standard unbalances the Farovia section rows.) |
||
===Farovia Quests=== |
===Farovia Quests=== |
||
| + | :<span style="background-color:lightgrey"> </span> = Bonus Quest |
||
| + | :<span style="background-color:#00dd00"> </span> = SBQ |
||
{| |
{| |
||
| Line 48: | Line 88: | ||
|align="center"|[[Oak Branch Quests#Poison Acorn Brownie | Poison Acorn Brownie]] |
|align="center"|[[Oak Branch Quests#Poison Acorn Brownie | Poison Acorn Brownie]] |
||
|- |
|- |
||
| − | |align="center"|[[Oak Branch Quests#SBQ1_-_Waterport| Waterport]] |
+ | |align="center" bgcolor="#4cc34c"|[[Oak Branch Quests#SBQ1_-_Waterport| Waterport]] |
|} |
|} |
||
| |
| |
||
| Line 64: | Line 104: | ||
|align="center"|[[Broken Standard Quests#Stumbling Pie | Stumbling Pie]] |
|align="center"|[[Broken Standard Quests#Stumbling Pie | Stumbling Pie]] |
||
|- |
|- |
||
| − | |align="center"|[[Broken Standard Quests#SBQ1_-_Waterport| Waterport]] |
+ | |align="center" bgcolor="#00dd00"|[[Broken Standard Quests#SBQ1_-_Waterport| Waterport]] |
|} |
|} |
||
| |
| |
||
| Line 80: | Line 120: | ||
|align="center"|[[Fancy Rifle-pole Quests#Trigger Fingers | Trigger Fingers]] |
|align="center"|[[Fancy Rifle-pole Quests#Trigger Fingers | Trigger Fingers]] |
||
|- |
|- |
||
| − | |align="center"|[[Fancy Rifle-pole Quests#SBQ1_-_Waterport| Waterport]] |
+ | |align="center" bgcolor="#00dd00"|[[Fancy Rifle-pole Quests#SBQ1_-_Waterport| Waterport]] |
|} |
|} |
||
| |
| |
||
| Line 96: | Line 136: | ||
|align="center"|[[Excali-pole Quests#Royal Soufflé | Royal Soufflé]] |
|align="center"|[[Excali-pole Quests#Royal Soufflé | Royal Soufflé]] |
||
|- |
|- |
||
| − | |align="center"|[[Excali-pole Quests#SBQ2_-_Fishertonville| Fishertonville]] |
+ | |align="center" bgcolor="#00dd00"|[[Excali-pole Quests#SBQ2_-_Fishertonville| Fishertonville]] |
|} |
|} |
||
|- |
|- |
||
| Line 114: | Line 154: | ||
|align="center"|[[Necro-pole Quests#Necro Shooters | Necro Shooters]] |
|align="center"|[[Necro-pole Quests#Necro Shooters | Necro Shooters]] |
||
|- |
|- |
||
| − | |align="center"|[[Necro-pole Quests#SBQ2_-_Fishertonville| Fishertonville]] |
+ | |align="center" bgcolor="#4cc34c"|[[Necro-pole Quests#SBQ2_-_Fishertonville| Fishertonville]] |
|} |
|} |
||
| |
| |
||
| Line 132: | Line 172: | ||
|align="center"|[[Cubey Incinerator Quests#Lava Fondue | Lava Fondue]] |
|align="center"|[[Cubey Incinerator Quests#Lava Fondue | Lava Fondue]] |
||
|- |
|- |
||
| − | |align="center"|[[Cubey Incinerator Quests# |
+ | |align="center" bgcolor="#00dd00"|[[Cubey Incinerator Quests#SBQ4_-_Magma Reef | Magma Reef]] |
|} |
|} |
||
| |
| |
||
| Line 150: | Line 190: | ||
|align="center"|[[Steam Powered Hydro-pole Quests#Turtle Pie| Turtle Pie]] |
|align="center"|[[Steam Powered Hydro-pole Quests#Turtle Pie| Turtle Pie]] |
||
|- |
|- |
||
| − | |align="center"|[[Steam Powered Hydro-pole Quests# |
+ | |align="center" bgcolor="#00dd00"|[[Steam Powered Hydro-pole Quests#SBQ3_-_Blue Crescent| Blue Crescent]] |
|} |
|} |
||
| |
| |
||
| Line 170: | Line 210: | ||
|align="center"|[[Sonar_Pulverizer_Quests#Sugar Cookies | Sugar Cookies]] |
|align="center"|[[Sonar_Pulverizer_Quests#Sugar Cookies | Sugar Cookies]] |
||
|- |
|- |
||
| − | |align="center"|[[Sonar_Pulverizer_Quests# |
+ | |align="center" bgcolor="#00dd00"|[[Sonar_Pulverizer_Quests#SBQ3_-_Blue Crescent| Blue Crescent]] |
|} |
|} |
||
|- |
|- |
||
| Line 190: | Line 230: | ||
|align="center"|[[Pneumatic Spear Quests#Peanut Jelly Cookies | Peanut Jelly Cookies]] |
|align="center"|[[Pneumatic Spear Quests#Peanut Jelly Cookies | Peanut Jelly Cookies]] |
||
|- |
|- |
||
| − | |align="center"|[[Pneumatic Spear Quests#Sans Culpra | Sans Culpra]] |
+ | |align="center" bgcolor="#00dd00"|[[Pneumatic Spear Quests#Sans Culpra | Sans Culpra]] |
|} |
|} |
||
| |
| |
||
| Line 210: | Line 250: | ||
|align="center"|[[Alcatraz Quests#Crunchsters | Crunchsters ]] |
|align="center"|[[Alcatraz Quests#Crunchsters | Crunchsters ]] |
||
|- |
|- |
||
| − | |align="center"|[[Alcatraz Quests#Geminisles | Geminisles]] |
+ | |align="center" bgcolor="#00dd00"|[[Alcatraz Quests#Geminisles | Geminisles]] |
|} |
|} |
||
| |
| |
||
| Line 230: | Line 270: | ||
|align="center"|[[Nail Fly Quests#Tricorn Tiramisu | Tricorn Tiramisu]] |
|align="center"|[[Nail Fly Quests#Tricorn Tiramisu | Tricorn Tiramisu]] |
||
|- |
|- |
||
| − | |align="center"|[[ |
+ | |align="center" bgcolor="#00dd00"|[[Nail Fly Quests#SBQ10_-_Ten Year Storm | Ten Year Storm]] |
|} |
|} |
||
| |
| |
||
| Line 250: | Line 290: | ||
|align="center"|[[Palm Spear Quests#Jubilant Jelly | Jubilant Jelly]] |
|align="center"|[[Palm Spear Quests#Jubilant Jelly | Jubilant Jelly]] |
||
|- |
|- |
||
| − | |align="center"|[[ |
+ | |align="center" bgcolor="#00dd00"|[[Palm Spear Quests#SBQ10_-_Ten Year Storm | Ten Year Storm]] |
|} |
|} |
||
|- |
|- |
||
| Line 270: | Line 310: | ||
|align="center"|[[Kelp Net Quests#Fatty Fudge | Fatty Fudge]] |
|align="center"|[[Kelp Net Quests#Fatty Fudge | Fatty Fudge]] |
||
|- |
|- |
||
| − | |align="center"|[[Kelp Net Quests# |
+ | |align="center" bgcolor="#00dd00"|[[Kelp Net Quests#SBQ10_-_Ten Year Storm | Ten Year Storm]] |
|} |
|} |
||
| |
| |
||
| Line 289: | Line 329: | ||
|- |
|- |
||
|align="center"|[[Sling Spear Quests#Gold Flake Sundae | Gold Flake Sundae]] |
|align="center"|[[Sling Spear Quests#Gold Flake Sundae | Gold Flake Sundae]] |
||
| + | |- |
||
| + | |align="center" bgcolor="#00dd00"|[[Sling Spear Quests#Shipwreck Explorer SBQ|Shipwreck Explorer SBQ]] |
||
|} |
|} |
||
| |
| |
||
| Line 307: | Line 349: | ||
|- |
|- |
||
|align="center"|[[Torpedo Spear Quests#Torpedo Tiramisu | Torpedo Tiramisu]] |
|align="center"|[[Torpedo Spear Quests#Torpedo Tiramisu | Torpedo Tiramisu]] |
||
| + | |- |
||
| + | |align="center" bgcolor="#00dd00"|[[Torpedo Spear Quests#Shipwreck Explorer SBQ|Shipwreck Explorer SBQ]] |
||
|} |
|} |
||
| |
| |
||
| Line 325: | Line 369: | ||
|- |
|- |
||
|align="center"|[[Electro Spear Quests#Psychotic Shortcake | Psychotic Shortcake]] |
|align="center"|[[Electro Spear Quests#Psychotic Shortcake | Psychotic Shortcake]] |
||
| + | |- |
||
| + | |align="center" bgcolor="#00dd00"|[[Electro Spear Quests#Shipwreck Explorer SBQ|Shipwreck Explorer SBQ]] |
||
|} |
|} |
||
|- |
|- |
||
| − | <!-- Guardian Grabber --> |
||
|valign="top"| |
|valign="top"| |
||
{|border="1" |
{|border="1" |
||
| Line 343: | Line 388: | ||
|- |
|- |
||
|align="center"|[[Guardian Grabber Quests#Angel Aquarium | Angel Aquarium]] |
|align="center"|[[Guardian Grabber Quests#Angel Aquarium | Angel Aquarium]] |
||
| + | |- |
||
| + | |align="center" bgcolor="#00dd00"|[[Guardian Grabber Quests#Saving Lucidia SBQ|Saving Lucidia SBQ]] |
||
|} |
|} |
||
| |
| |
||
| Line 361: | Line 408: | ||
|- |
|- |
||
|align="center"|[[Danger Destroyer Quests#Danger Chamber | Danger Chamber]] |
|align="center"|[[Danger Destroyer Quests#Danger Chamber | Danger Chamber]] |
||
| + | |- |
||
| + | |align="center" bgcolor="#00dd00"|[[Danger Destroyer Quests#Saving Lucidia SBQ|Saving Lucidia SBQ]] |
||
|} |
|} |
||
| |
| |
||
| Line 379: | Line 428: | ||
|align="center"|[[Holy_Liberator_Quests#Angelicake | Angelicake]] |
|align="center"|[[Holy_Liberator_Quests#Angelicake | Angelicake]] |
||
|- |
|- |
||
| − | |align="center"|[[Holy_Liberator_Quests#Icelantica | Icelantica]] |
+ | |align="center" bgcolor="#00dd00"|[[Holy_Liberator_Quests#Icelantica | Icelantica]] |
|} |
|} |
||
| |
| |
||
| Line 398: | Line 447: | ||
|align="center"|[[Evil_Obliterator_Quests#Piranha Parfait | Piranha Parfait]] |
|align="center"|[[Evil_Obliterator_Quests#Piranha Parfait | Piranha Parfait]] |
||
|- |
|- |
||
| − | |align="center"|[[Evil_Obliterator_Quests#Icelantica | Icelantica]] |
+ | |align="center" bgcolor="#00dd00"|[[Evil_Obliterator_Quests#Icelantica | Icelantica]] |
|} |
|} |
||
| |
| |
||
| Line 418: | Line 467: | ||
|align="center"|[[Algaenite_Quests#Sig's_Martini | Sig's Martini]] |
|align="center"|[[Algaenite_Quests#Sig's_Martini | Sig's Martini]] |
||
|- |
|- |
||
| − | |align="center"|[[Algaenite_Quests#Freezer Full of Fillets| Freezer Full of Fillets]] |
+ | |align="center" bgcolor="lightgrey"|[[Algaenite_Quests#Freezer Full of Fillets| Freezer Full of Fillets]] |
|- |
|- |
||
| − | |align="center"|[[Algaenite_Quests#Sigs| Sigs]] |
+ | |align="center" bgcolor="#00dd00"|[[Algaenite_Quests#Sigs| Sigs]] |
|} |
|} |
||
| |
| |
||
| Line 439: | Line 488: | ||
|align="center"|[[Planktonite_Quests#Sig's_Sangria | Sig's Sangria]] |
|align="center"|[[Planktonite_Quests#Sig's_Sangria | Sig's Sangria]] |
||
|- |
|- |
||
| − | |align="center"|[[Planktonite_Quests#Oil Drum of Hump Soup | Oil Drum of Hump Soup]] |
+ | |align="center" bgcolor="lightgrey"|[[Planktonite_Quests#Oil Drum of Hump Soup | Oil Drum of Hump Soup]] |
|- |
|- |
||
| − | |align="center"|[[Planktonite_Quests#Sigs | Sigs]] |
+ | |align="center" bgcolor="#00dd00"|[[Planktonite_Quests#Sigs | Sigs]] |
|} |
|} |
||
| |
| |
||
| Line 460: | Line 509: | ||
|align="center"|[[Royal_Rescuer_Quests#Lemon Meringue | Lemon Meringue]] |
|align="center"|[[Royal_Rescuer_Quests#Lemon Meringue | Lemon Meringue]] |
||
|- |
|- |
||
| − | |align="center"|[[Royal_Rescuer_Quests#Flip | Flip]] |
+ | |align="center" bgcolor="lightgrey"|[[Royal_Rescuer_Quests#Flip | Flip]] |
|- |
|- |
||
| − | |align="center"|[[ |
+ | |align="center" bgcolor="#00dd00"|[[Royal_Rescuer_Quests#Parribea | Parribea]] |
|} |
|} |
||
| |
| |
||
| Line 482: | Line 531: | ||
|align="center"|[[Pyratic_Plunder_Quests#Lemon Squares | Lemon Squares]] |
|align="center"|[[Pyratic_Plunder_Quests#Lemon Squares | Lemon Squares]] |
||
|- |
|- |
||
| − | |align="center"|[[Pyratic_Plunder_Quests#Glogg | Glogg]] |
+ | |align="center" bgcolor="lightgrey"|[[Pyratic_Plunder_Quests#Glogg | Glogg]] |
|- |
|- |
||
| − | |align="center"|[[Pyratic_Plunder_Quests#Parribea | Parribea]] |
+ | |align="center" bgcolor="#00dd00"|[[Pyratic_Plunder_Quests#Parribea | Parribea]] |
| + | |} |
||
| + | |- |
||
| + | |valign="top"| |
||
| + | {|border="1" |
||
| + | |height="120" width="200" align="center"|[[Image:Oak-twig48.jpg|85px|link=Oak Twig Quests]]<br />'''[[Oak Twig Quests]]''' |
||
| + | |- |
||
| + | |align="center"|[[Oak Twig Quests#Cajun_Kittyfish | Cajun Kittyfish]] |
||
| + | |- |
||
| + | |align="center"|[[Oak Twig Quests#Tiny_Medley | Tiny Medley]] |
||
| + | |- |
||
| + | |align="center"|[[Oak Twig Quests#Small_Platter | Small Platter]] |
||
| + | |- |
||
| + | |align="center"|[[Oak Twig Quests#Slim_Delight | Slim Delight]] |
||
| + | |- |
||
| + | |align="center" bgcolor="#00dd00"|[[Oak Twig Quests#Wahwahport SBQ|Wahwahport SBQ]] |
||
| + | |} |
||
| + | | |
||
| + | |valign="top"| |
||
| + | {|border="1" |
||
| + | |height="120" width="200" align="center"|[[Image:Kiddie-standard49.jpg|85px|link=Kiddie Standard Quests]]<br />'''[[Kiddie Standard Quests]]''' |
||
| + | |- |
||
| + | |align="center"|[[Kiddie Standard Quests#Crape_Sliders | Crape Sliders]] |
||
| + | |- |
||
| + | |align="center"|[[Kiddie Standard Quests#Minnow_Sticks | Minnow Sticks]] |
||
| + | |- |
||
| + | |align="center"|[[Kiddie Standard Quests#Cheap_Filet | Cheap Filet]] |
||
| + | |- |
||
| + | |align="center"|[[Kiddie Standard Quests#Pie_Crumb | Pie Crumb]] |
||
| + | |- |
||
| + | |align="center" bgcolor="#00dd00"|[[Kiddie Standard Quests#Wahwahport SBQ|Wahwahport SBQ]] |
||
| + | |} |
||
| + | | |
||
| + | |valign="top"| |
||
| + | {|border="1" |
||
| + | |height="120" width="200" align="center"|[[Image:50-rkr-blank.jpg|85px|link=Rocket Rod Quests]]<br />'''[[Rocket Rod Quests]]''' |
||
| + | |- |
||
| + | |align="center"|[[Rocket Rod Quests#Tiny_Creole | Tiny Creole]] |
||
| + | |- |
||
| + | |align="center"|[[Rocket Rod Quests#Barbaque Wibs|Barbaque Wibs]] |
||
| + | |- |
||
| + | |align="center"|[[Rocket Rod Quests#Filet de Dialo|Filet de Dialo]] |
||
| + | |- |
||
| + | |align="center"|[[Rocket Rod Quests#Final Tigey|Final Tigey]] |
||
| + | |- |
||
| + | |align="center"|[[Rocket Rod Quests#Itzo Shooters|Itzo Shooters]] |
||
| + | |- |
||
| + | |align="center" bgcolor="#00dd00"|[[Rocket Rod Quests#Wahwahville SBQ|Wahwahville SBQ]] |
||
| + | |} |
||
| + | | |
||
| + | |valign="top"| |
||
| + | {|border="1" |
||
| + | |height="120" width="200" align="center"|[[Image:51-et-blank.jpg|85px|link=Excali-toy Quests]]<br />'''[[Excali-toy Quests]]''' |
||
| + | |- |
||
| + | |align="center"|[[Excali-toy Quests#Peasants_Crumb | Peasants Crumb]] |
||
| + | |- |
||
| + | |align="center"|[[Excali-toy Quests#Baby Brew|Baby Brew]] |
||
| + | |- |
||
| + | |align="center"|[[Excali-toy Quests#Elwis Casserole|Elwis Casserole]] |
||
| + | |- |
||
| + | |align="center"|[[Excali-toy Quests#Ovark Souffle|Ovark Souffle]] |
||
| + | |- |
||
| + | |align="center"|[[Excali-toy Quests#Stinging Shooters|Stinging Shooters]] |
||
| + | |- |
||
| + | |align="center" bgcolor="#00dd00"|[[Excali-toy Quests#Wahwahville SBQ|Wahwahville SBQ]] |
||
| + | |} |
||
| + | |- |
||
| + | |valign="top"| |
||
| + | {|border="1" |
||
| + | |height="120" width="200" align="center"|[[Image:Bubble-powered-aqua-pole.jpg|85px|link=Bubble Powered Aqua-pole Quests]]<br />'''[[Bubble Powered Aqua-pole Quests]]''' |
||
| + | |- |
||
| + | |align="center"|[[Bubble Powered Aqua-pole Quests#Steamed Formula|Steamed Formula]] |
||
| + | |- |
||
| + | |align="center"|[[Bubble Powered Aqua-pole Quests#Meat Mush|Meat Mush]] |
||
| + | |- |
||
| + | |align="center"|[[Bubble Powered Aqua-pole Quests#Tiny Tartare|Tiny Tartare]] |
||
| + | |- |
||
| + | |align="center"|[[Bubble Powered Aqua-pole Quests#Run Reuben|Run Reuben]] |
||
| + | |- |
||
| + | |align="center"|[[Bubble Powered Aqua-pole Quests#Wadio Pie|Wadio Pie]] |
||
| + | |- |
||
| + | |align="center" bgcolor="#00dd00"|[[Bubble Powered Aqua-pole Quests#Wahwah Crescent SBQ|Wahwah Crescent SBQ]] |
||
| + | |} |
||
| + | | |
||
| + | |valign="top"| |
||
| + | {|border="1" |
||
| + | |height="120" width="200" align="center"|[[Image:Radio-rod.jpg|85px|link=Radio Rod Quests]]<br />'''[[Radio Rod Quests]]''' |
||
| + | |- |
||
| + | |align="center"|[[Radio Rod Quests#Bloomin Wayzer|Bloomin Wayzer]] |
||
| + | |- |
||
| + | |align="center"|[[Radio Rod Quests#Madador Nuggets|Madador Nuggets]] |
||
| + | |- |
||
| + | |align="center"|[[Radio Rod Quests#Shark Wrap|Shark Wrap]] |
||
| + | |- |
||
| + | |align="center"|[[Radio Rod Quests#Slippery Stirfry|Slippery Stirfry]] |
||
| + | |- |
||
| + | |align="center"|[[Radio Rod Quests#Surfs Ubb|Surfs Ubb]] |
||
| + | |- |
||
| + | |align="center" bgcolor="#00dd00"|[[Radio Rod Quests#Wahwah Crescent SBQ|Wahwah Crescent SBQ]] |
||
| + | |} |
||
| + | | |
||
| + | |valign="top"| |
||
| + | {|border="1" |
||
| + | |height="120" width="200" align="center"|[[Image:Ubeewador.jpg|85px|link=Ubeewador Quests]]<br />'''[[Ubeewador Quests]]''' |
||
| + | |- |
||
| + | | align="center" | [[Ubeewador Quests#Freezing Hot Miwk|Freezing Hot Miwk]] |
||
| + | |- |
||
| + | | align="center" | [[Ubeewador Quests#Lava Tacquitos|Lava Tacquitos]] |
||
| + | |- |
||
| + | | align="center" | [[Ubeewador Quests#Minnow Kabobs|Minnow Kabobs]] |
||
| + | |- |
||
| + | | align="center" | [[Ubeewador Quests#Phire Philet|Phire Philet]] |
||
| + | |- |
||
| + | | align="center" | [[Ubeewador Quests#Wava Fundoo|Wava Fundoo]] |
||
| + | |- |
||
| + | |align="center" bgcolor="#00dd00"|[[Ubeewador Quests#Wahwah Reef SBQ|Wahwah Reef SBQ]] |
||
| + | |} |
||
| + | | |
||
| + | |valign="top"| |
||
| + | {|border="1" |
||
| + | |height="120" width="200" align="center"|[[Image:Lost-kayu.jpg|85px|link=Lost Kayu Quests]]<br />'''[[Lost Kayu Quests]]''' |
||
| + | |- |
||
| + | |align="center"| [[Lost Kayu Quests#Meow_Filet | Meow Filet]] |
||
| + | |- |
||
| + | |align="center"| [[Lost Kayu Quests#Saw_Sus | Saw Sus]] |
||
| + | |- |
||
| + | |align="center"| [[Lost Kayu Quests#Janger_Sup | Janger Sup]] |
||
| + | |- |
||
| + | |align="center"| [[Lost Kayu Quests#Sweet_Sate | Sweet Sate]] |
||
| + | |- |
||
| + | |align="center"| [[Lost Kayu Quests#Nasi_Goreng | Nasi Goreng]] |
||
| + | |- |
||
| + | |align="center"| [[Lost Kayu Quests#Baticake | Baticake]] |
||
| + | |- |
||
| + | |align="center" bgcolor="#00dd00"|[[Lost Kayu Quests#Lost Temple SBQ|Lost Temple SBQ]] |
||
| + | |} |
||
| + | |} |
||
| + | {| |
||
| + | |valign="top"| |
||
| + | {|border="1" |
||
| + | |height="140" width="200" align="center"|[[Image:Lost-ikan.jpg|85px|link=Lost Ikan Quests]]<br />'''[[Lost Ikan Quests]]''' |
||
| + | |- |
||
| + | |align="center"| [[Lost Ikan Quests#Krim_Pai | Krim Pai]] |
||
| + | |- |
||
| + | |align="center"| [[Lost Ikan Quests#Komodo_Kebab | Komodo Kebab]] |
||
| + | |- |
||
| + | |align="center"| [[Lost Ikan Quests#Buto_Beans | Buto Beans]] |
||
| + | |- |
||
| + | |align="center"| [[Lost Ikan Quests#Butofu | Butofu]] |
||
| + | |- |
||
| + | |align="center"| [[Lost Ikan Quests#Bananasplitfire | Bananasplitfire]] |
||
| + | |- |
||
| + | |align="center"| [[Lost Ikan Quests#Kraka_Goreng | Kraka Goreng]] |
||
| + | |- |
||
| + | |align="center" bgcolor="#00dd00"|[[Lost Ikan Quests#Lost Temple SBQ|Lost Temple SBQ]] |
||
| + | |} |
||
| + | | |
||
| + | |valign="top"| |
||
| + | {| border="1" |
||
| + | |height="140" width="310" align="center" colspan="2"|[[Image:Fariana-submarina.jpg|85px|link=Fariana Submarina Quests]]<br />'''[[Fariana Submarina Quests]]''' |
||
| + | |- |
||
| + | |align="center"| [[Fariana Submarina Quests#Octobutter Salad |Octobutter Salad]] |
||
| + | |align="center"| [[Fariana Submarina Quests#Spaghetti Fishetti | Spaghetti Fishetti]] |
||
| + | |- |
||
| + | | align="center"| [[Fariana Submarina Quests#Escarcoffin |Escarcoffin]] |
||
| + | | align="center"| [[Fariana Submarina Quests#Surf n Soup |Surf n Soup]] |
||
| + | |- |
||
| + | | align="center"| [[Fariana Submarina Quests#Grilled Shrimp |Grilled Shrimp]] |
||
| + | | align="center"| [[Fariana Submarina Quests#Crabfishcake |Crabfishcake]] |
||
| + | |- |
||
| + | | align="center"| [[Fariana Submarina Quests#Stuffed Fish n Fish |Stuffed Fish n Fish]] |
||
| + | | align="center"| [[Fariana Submarina Quests#Killer Soup |Killer Soup]] |
||
| + | |- |
||
| + | | align="center"| [[Fariana Submarina Quests#Flaming Marrus |Flaming Marrus]] |
||
| + | | align="center"| [[Fariana Submarina Quests#Beast of a Feast |Beast of a Feast]] |
||
| + | |- |
||
| + | |align="center" bgcolor="#00dd00" colspan="2"|[[Fariana Submarina Quests#Fariana Trench SBQ|Fariana Trench SBQ]] |
||
| + | |} |
||
| + | | |
||
| + | |valign="top"| |
||
| + | {| border="1" |
||
| + | |height="140" width="380" align="center" colspan="2"|[[Image:Reelistic.jpg|85px|link=Reelistic Quests]]<br />'''[[Reelistic Quests]]''' |
||
| + | |- |
||
| + | |align="center"| [[Reelistic Quests#Black 'n Blue|Black 'n Blue]] |
||
| + | |align="center"| [[Reelistic Quests#Salmon Surprise|Salmon Surprise]] |
||
| + | |- |
||
| + | | align="center"| [[Reelistic Quests#Baked Splake|Baked Splake]] |
||
| + | | align="center"| [[Reelistic Quests#Trout Pie|Trout Pie]] |
||
| + | |- |
||
| + | | align="center"| [[Reelistic Quests#Smelted Perch|Smelted Perch]] |
||
| + | | align="center"| [[Reelistic Quests#Fried Catfish|Fried Catfish]] |
||
| + | |- |
||
| + | | align="center"| [[Reelistic Quests#Small Brown|Small Brown]] |
||
| + | | align="center"| [[Reelistic Quests#Poached Sturgeon|Poached Sturgeon]] |
||
| + | |- |
||
| + | | align="center"| [[Reelistic Quests#Buttered Burbot|Buttered Burbot]] |
||
| + | | align="center"| [[Reelistic Quests#Rakkaus Wedding Cake|Rakkaus Wedding Cake]] |
||
| + | |- |
||
| + | |align="center" bgcolor="#00dd00" colspan="2"|[[Reelistic Quests#Big Love SBQ|Big Love SBQ]] |
||
| + | |} |
||
| + | |} |
||
| + | {| |
||
| + | |valign="top"| |
||
| + | {|border="1" |
||
| + | |height="140" width="200" align="center"|[[Image:Eldritch.jpg|85px|link=Eldritch Quests]]<br />'''[[Eldritch Quests]]''' |
||
| + | |- |
||
| + | |align="center"| [[Eldritch_Quests#I_.26_I.27s|I & I's]] |
||
| + | |- |
||
| + | |align="center"| [[Eldritch Quests#Fish Fat|Fish Fat]] |
||
| + | |- |
||
| + | |align="center"| [[Eldritch Quests#Twigs|Twigs]] |
||
| + | |- |
||
| + | |align="center"| [[Eldritch Quests#Lickers|Lickers]] |
||
| + | |- |
||
| + | |align="center"| [[Eldritch Quests#Jozek.27s_Fish_Cups|Jozek's Fish Cups]] |
||
| + | |} |
||
| + | | |
||
| + | |valign="top"| |
||
| + | {| border="1" |
||
| + | |height="140" width="310" align="center" colspan="2"|[[Image:Innsmouth_Suit.jpg|85px|link=Innsmouth Suit Quests]]<br />'''[[Innsmouth Suit Quests]]''' |
||
| + | |- |
||
| + | |align="center"| ?? |
||
| + | |- |
||
| + | |align="center"| ?? |
||
| + | |- |
||
| + | |align="center"| ?? |
||
| + | |- |
||
| + | |align="center"| ?? |
||
| + | |- |
||
| + | |align="center"| ?? |
||
| + | |} |
||
| + | |valign="top"| |
||
| + | {|border="1" |
||
| + | |height="140" width="200" align="center"|[[Image:Dirigible.jpg|85px|link=Dirigible Quests]]<br />'''[[Dirigible Quests]]''' |
||
| + | |- |
||
| + | |align="center"| [[Dirigible_Quests#First Flight|First Flight]] |
||
| + | |- |
||
| + | |align="center"| [[Dirigible Quests#Faster and Higher|Faster and Higher]] |
||
| + | |- |
||
| + | |align="center"| [[Dirigible Quests#Death-Defying|Death-Defying]] |
||
| + | |- |
||
| + | |align="center"| [[Dirigible Quests#Superstars|Superstars]] |
||
| + | |- |
||
| + | |align="center"| [[Dirigible Quests#Epic Test|Epic Test]] |
||
| + | |- |
||
| + | |align="center"| [[Dirigible Quests#Legendary Test|Legendary Test]] |
||
| + | |} |
||
| + | | |
||
| + | |valign="top"| |
||
| + | {|border="1" |
||
| + | |height="140" width="200" align="center"|[[Image:Mission-recovery.jpg|85px|link= Mission Recovery Quests]]<br />'''[[ Mission Recovery Quests]]''' |
||
| + | |- |
||
| + | |align="center"| [[Mission Recovery_Quests#Classic Aviators|Classic Aviators]] |
||
| + | |- |
||
| + | |align="center"| [[Mission Recovery Quests#Flying Aces|Flying Aces]] |
||
| + | |- |
||
| + | |align="center"| [[Mission Recovery Quests#Combat Pilots|Combat Pilots]] |
||
| + | |- |
||
| + | |align="center"| [[Mission Recovery Quests#Hypersonic Pilots|Hypersonic Pilots]] |
||
| + | |- |
||
| + | |align="center"| [[Mission Recovery Quests#Mercury Mission|Mercury Mission]] |
||
| + | |- |
||
| + | |align="center"| [[Mission Recovery Quests#International Space|International Space]] |
||
| + | |- |
||
| + | |align="center"| [[Mission Recovery Quests#Apollo Mission|Apollo Mission]] |
||
|} |
|} |
||
|} |
|} |
||
<br /> |
<br /> |
||
| − | [[Category:Quests]] |
||
===Roperia Quests=== |
===Roperia Quests=== |
||
| + | :<span style="background-color:lightgrey"> </span> = Bonus Quest |
||
| − | |||
| + | :<span style="background-color:#00dd00"> </span> = SBQ |
||
| − | |||
{| |
{| |
||
| Line 507: | Line 819: | ||
| align="center"|[[Crapolé_Quests#Heap Cake |Heap Cake]] |
| align="center"|[[Crapolé_Quests#Heap Cake |Heap Cake]] |
||
|- |
|- |
||
| − | | align="center"|[[Crapolé_Quests#SBQ11 - Santa Francesca |Santa Francesca]] |
+ | | align="center" bgcolor="#00dd00"|[[Crapolé_Quests#SBQ11 - Santa Francesca |Santa Francesca]] |
|} |
|} |
||
| |
| |
||
| Line 522: | Line 834: | ||
| align="center"|[[Floral_Standard_Quests#Floral Cookies |Floral Cookies]] |
| align="center"|[[Floral_Standard_Quests#Floral Cookies |Floral Cookies]] |
||
|- |
|- |
||
| − | | align="center"|[[Floral_Standard_Quests#SBQ11 - Santa Francesca |Santa Francesca]] |
+ | | align="center" bgcolor="#00dd00"|[[Floral_Standard_Quests#SBQ11 - Santa Francesca |Santa Francesca]] |
|} |
|} |
||
| |
| |
||
| Line 537: | Line 849: | ||
| align="center"|[[Landscaper_Quests#Petal Pie |Petal Pie]] |
| align="center"|[[Landscaper_Quests#Petal Pie |Petal Pie]] |
||
|- |
|- |
||
| − | | align="center"|[[Landscaper_Quests#SBQ11 - Santa Francesca |Santa Francesca]] |
+ | | align="center" bgcolor="#00dd00"|[[Landscaper_Quests#SBQ11 - Santa Francesca |Santa Francesca]] |
|} |
|} |
||
| |
| |
||
| Line 551: | Line 863: | ||
|- |
|- |
||
| align="center"|[[Lightning_Rod_Quests#Midgard Mousse | Midgard Mousse]] |
| align="center"|[[Lightning_Rod_Quests#Midgard Mousse | Midgard Mousse]] |
||
| + | |- |
||
| + | | align="center" bgcolor="#00dd00"|[[Lightning_Rod_Quests#SBQ12_-_New_Seinborough|New Seinborough]] |
||
|} |
|} |
||
|} |
|} |
||
| Line 567: | Line 881: | ||
|- |
|- |
||
| align="center"|[[Revelation_Rod_Quests#Apocalypse Strudel |Apocalypse Strudel]] |
| align="center"|[[Revelation_Rod_Quests#Apocalypse Strudel |Apocalypse Strudel]] |
||
| + | |- |
||
| + | | align="center" bgcolor="#00dd00"|[[Revelation_Rod_Quests#SBQ12_-_New_Seinborough|New Seinborough]] |
||
|} |
|} |
||
| |
| |
||
| Line 584: | Line 900: | ||
|- |
|- |
||
| align="center"|[[Coal_Powered_Thermo-pole_Quests#Streamer_Steaks|Streamer Steaks]] |
| align="center"|[[Coal_Powered_Thermo-pole_Quests#Streamer_Steaks|Streamer Steaks]] |
||
| + | |- |
||
| + | | align="center" bgcolor="#00dd00"|[[Shredder_Quests#SBQ13_-_Redwood Crescent|Redwood Crescent]] |
||
|} |
|} |
||
| |
| |
||
| Line 601: | Line 919: | ||
|- |
|- |
||
| align="center"| [[Shredder_Quests#OxMilk_Shake|OxMilk Shake]] |
| align="center"| [[Shredder_Quests#OxMilk_Shake|OxMilk Shake]] |
||
| + | |- |
||
| + | | align="center" bgcolor="#00dd00"| [[Shredder_Quests#SBQ13_-_Redwood Crescent|Redwood Crescent]] |
||
|} |
|} |
||
| |
| |
||
| Line 618: | Line 938: | ||
|- |
|- |
||
| align="center"| [[Nueron_Transducer_Quests#Galaxy Gelatin|Galaxy Gelatin]] |
| align="center"| [[Nueron_Transducer_Quests#Galaxy Gelatin|Galaxy Gelatin]] |
||
| + | |- |
||
| + | |align="center" bgcolor="#00dd00"|[[Nueron Transducer Quests#Asteroid Reef SBQ|Asteroid Reef SBQ]] |
||
|} |
|} |
||
|} |
|} |
||
| Line 636: | Line 958: | ||
|- |
|- |
||
| align="center"| [[Legionnaires_Lance_Quests#Jelly Doughnuts|Jelly Doughnuts]] |
| align="center"| [[Legionnaires_Lance_Quests#Jelly Doughnuts|Jelly Doughnuts]] |
||
| + | |- |
||
| + | |align="center" bgcolor="#00dd00"|[[Legionnaires Lance Quests#Helvetica SBQ|Helvetica SBQ]] |
||
|} |
|} |
||
| |
| |
||
| Line 656: | Line 980: | ||
| align="center"|[[Folsom_Quests#Marinara_Medley|Marinara Medley]] |
| align="center"|[[Folsom_Quests#Marinara_Medley|Marinara Medley]] |
||
| align="center"|[[Folsom_Quests#Freeze_Dried_Ice_Cream|Freeze Dried Ice Cream]] |
| align="center"|[[Folsom_Quests#Freeze_Dried_Ice_Cream|Freeze Dried Ice Cream]] |
||
| + | |- |
||
| + | |align="center" bgcolor="#00dd00" colspan="2"|[[Folsom Quests#Mount Promontory SBQ|Mount Promontory SBQ]] |
||
|} |
|} |
||
| |
| |
||
| Line 673: | Line 999: | ||
|- |
|- |
||
| align="center"|[[Outback_Quests#Blue_Ring_Kalamari|Blue Ring Kalamari]] |
| align="center"|[[Outback_Quests#Blue_Ring_Kalamari|Blue Ring Kalamari]] |
||
| + | |- |
||
| + | |align="center" bgcolor="#00dd00"|[[Outback Quests#Zyrbelia SBQ|Zyrbelia SBQ]] |
||
|} |
|} |
||
|} |
|} |
||
| Line 691: | Line 1,019: | ||
|- |
|- |
||
| align="center"| [[Survivalist_Quests#Butter Beetle Cookies|Butter Beetle Cookies]] |
| align="center"| [[Survivalist_Quests#Butter Beetle Cookies|Butter Beetle Cookies]] |
||
| + | |- |
||
| + | |align="center" bgcolor="#00dd00"|[[Survivalist Quests#Zyrbelia SBQ|Zyrbelia SBQ]] |
||
|} |
|} |
||
| |
| |
||
| Line 708: | Line 1,038: | ||
|- |
|- |
||
| align="center"| [[Poacherist_Quests#Sour_Centipedes|Sour Centipedes]] |
| align="center"| [[Poacherist_Quests#Sour_Centipedes|Sour Centipedes]] |
||
| + | |- |
||
| + | |align="center" bgcolor="#00dd00"|[[Poacherist Quests#Zyrbelia SBQ|Zyrbelia SBQ]] |
||
|} |
|} |
||
| |
| |
||
| Line 725: | Line 1,057: | ||
|- |
|- |
||
| align="center"| [[Great_Equalizer_Quests#Bandit_Beans|Bandit Beans]] |
| align="center"| [[Great_Equalizer_Quests#Bandit_Beans|Bandit Beans]] |
||
| + | |- |
||
| + | | align="center" bgcolor="lightgrey"| [[Great_Equalizer_Quests#Thanksgiving_Feast|Thanksgiving Feast]] |
||
| + | |- |
||
| + | |align="center" bgcolor="#00dd00"|[[Great Equalizer Quests#Dodge River SBQ|Dodge River SBQ]] |
||
|} |
|} |
||
| |
| |
||
| Line 742: | Line 1,078: | ||
|- |
|- |
||
| align="center"| [[Kolenya_Quests#Peyote_Pie|Peyote Pie]] |
| align="center"| [[Kolenya_Quests#Peyote_Pie|Peyote Pie]] |
||
| + | |- |
||
| + | | align="center" bgcolor="lightgrey"| [[Kolenya_Quests#Thanksgiving_Feast|Thanksgiving Feast]] |
||
| + | |- |
||
| + | |align="center" bgcolor="#00dd00"|[[Kolenya Quests#Dodge River SBQ|Dodge River SBQ]] |
||
|} |
|} |
||
|} |
|} |
||
| Line 760: | Line 1,100: | ||
|- |
|- |
||
| align="center"| [[Candy_Cane_Quests#Candy_Apple|Candy Apple]] |
| align="center"| [[Candy_Cane_Quests#Candy_Apple|Candy Apple]] |
||
| + | |- |
||
| + | |align="center" bgcolor="#00dd00"|[[Candy Cane Quests#Declination River SBQ|Declination River SBQ]] |
||
|} |
|} |
||
| |
| |
||
| Line 777: | Line 1,119: | ||
|- |
|- |
||
| align="center"| [[Medical_Mangler_Quests#Rainbow_Roll|Rainbow Roll]] |
| align="center"| [[Medical_Mangler_Quests#Rainbow_Roll|Rainbow Roll]] |
||
| + | |- |
||
| + | |align="center" bgcolor="#00dd00"|[[Medical Mangler Quests#Declination River SBQ|Declination River SBQ]] |
||
| + | |} |
||
| + | | |
||
| + | |valign="top"| |
||
| + | {| border="1" |
||
| + | |height="140" width="421" align="center" colspan="2"|[[Image:Cold-fusion.jpg|85px|link=Cold Fusion Quests]]<br />'''[[Cold Fusion Quests]]''' |
||
| + | |- |
||
| + | | align="center"| [[Cold_Fusion_Quests#Cold_Cakes|Cold Cakes]] |
||
| + | | align="center"| [[Cold_Fusion_Quests#Whale_Skewers|Whale Skewers]] |
||
| + | |- |
||
| + | | align="center"| [[Cold_Fusion_Quests#Cold_Cakes_II|Cold Cakes II]] |
||
| + | | align="center"| [[Cold_Fusion_Quests#Wild_Stew|Wild Stew]] |
||
| + | |- |
||
| + | | align="center"| [[Cold_Fusion_Quests#Iced_Chowder|Iced Chowder]] |
||
| + | | align="center"| [[Cold_Fusion_Quests#Fusion_Filet|Fusion Filet]] |
||
| + | |- |
||
| + | | align="center"| [[Cold_Fusion_Quests#Sundaepoda|Sundaepoda]] |
||
| + | | align="center"| [[Cold_Fusion_Quests#Fusion_Bannok|Fusion Bannok]] |
||
| + | |- |
||
| + | | align="center"| [[Cold_Fusion_Quests#Bacon_Muktuk|Bacon Muktuk]] |
||
| + | | align="center"| [[Cold_Fusion_Quests#Fusion_Wrap|Fusion Wrap]] |
||
| + | |- |
||
| + | | align="center"| [[Cold_Fusion_Quests#Dried Blubber|Dried Blubber]] |
||
| + | | align="center"| [[Cold_Fusion_Quests#Fusion_Cake|Fusion Cake]] |
||
| + | |- |
||
| + | |align="center" bgcolor="#00dd00" colspan="2"|[[Cold Fusion Quests#Backside of Icelantica SBQ|Backside of Icelantica SBQ]] |
||
| + | |} |
||
| + | |- |
||
| + | |valign="top"| |
||
| + | {| border="1" |
||
| + | | colspan="2" style="text-align: center; height: 140px; width: 100%;"|[[Image:Holy-hybrid.jpg|85px|link=Holy Hybrid Quests]]<br />'''[[Holy Hybrid Quests]]''' |
||
| + | |- |
||
| + | | align="center"| [[Holy_Hybrid_Quests#Holy_Cakes|Holy Cakes]] |
||
| + | | align="center"| [[Holy_Hybrid_Quests#Skewered_Jeans|Skewered Jeans]] |
||
| + | |- |
||
| + | | align="center"| [[Holy_Hybrid_Quests#Holy_Cakes_II|Holy Cakes II]] |
||
| + | | align="center"| [[Holy_Hybrid_Quests#|-]] |
||
| + | |- |
||
| + | | align="center"| [[Holy_Hybrid_Quests#Muffed_Muktuk|Muffed Muktuk]] |
||
| + | | align="center"| [[Holy_Hybrid_Quests#|-]] |
||
| + | |- |
||
| + | | align="center"| [[Holy_Hybrid_Quests#Sundaebeast|Sundaebeast]] |
||
| + | | align="center"| [[Holy_Hybrid_Quests#|-]] |
||
| + | |- |
||
| + | | align="center"| [[Holy_Hybrid_Quests#Star_Cakes|Star Cakes]] |
||
| + | | align="center"| [[Holy_Hybrid_Quests#|-]] |
||
| + | |- |
||
| + | | align="center"| [[Holy_Hybrid_Quests#Dry_Jeannes|Dry Jeannes]] |
||
| + | | align="center"| [[Holy_Hybrid_Quests#|-]] |
||
| + | |- |
||
| + | |align="center" bgcolor="#00dd00" colspan="2"|[[Holy Hybrid Quests#Backside of Icelantica SBQ|Backside of Icelantica SBQ]] |
||
| + | |} |
||
| + | | |
||
| + | |valign="top"| |
||
| + | {| border="1" |
||
| + | |height="140" width="200" align="center" |[[Image:Deputy.jpg|85px|link=Deputy Quests]]<br />'''[[Deputy Quests]]''' |
||
| + | |- |
||
| + | | align="center"| - |
||
| + | |- |
||
| + | | align="center"| - |
||
| + | |- |
||
| + | | align="center"| - |
||
| + | |- |
||
| + | | align="center"| - |
||
| + | |- |
||
| + | | align="center"| - |
||
| + | |- |
||
| + | | align="center"| - |
||
| + | |- |
||
| + | | align="center"| - |
||
| + | |- |
||
| + | |align="center" bgcolor="#00dd00"|[[Deputy Quests#Roperian Garbage Patch SBQ|Roperian Garbage Patch SBQ]] |
||
| + | |} |
||
| + | | |
||
| + | |valign="top"| |
||
| + | {| border="1" |
||
| + | |height="140" width="200" align="center" |[[Image:Remediator.png|85px|link=Remediator Quests]]<br />'''[[Remediator Quests]]''' |
||
| + | |- |
||
| + | | align="center"| - |
||
| + | |- |
||
| + | | align="center"| - |
||
| + | |- |
||
| + | | align="center"| - |
||
| + | |- |
||
| + | | align="center"| - |
||
| + | |- |
||
| + | | align="center"| - |
||
| + | |- |
||
| + | | align="center"| - |
||
| + | |- |
||
| + | | align="center"| - |
||
| + | |- |
||
| + | |align="center" bgcolor="#00dd00"|[[Remediator Quests#Roperian Garbage Patch SBQ|Roperian Garbage Patch SBQ]] |
||
|} |
|} |
||
|} |
|} |
||
| − | [[Category:Quests]] |
||
===General Tips=== |
===General Tips=== |
||
| Line 866: | Line 1,301: | ||
====Last Catch Boost==== |
====Last Catch Boost==== |
||
| − | The longer you go without a quest catch, the better chance you have of making a quest catch! The Last Catch boost resets after making a quest catch |
+ | The longer you go without a quest catch, the better chance you have of making a quest catch! The Last Catch boost resets after making a quest catch. |
{| |
{| |
||
| Line 896: | Line 1,331: | ||
|8× boost |
|8× boost |
||
|} |
|} |
||
| + | NOTE: While in [[Roperia]], wranglers can use the [[Resources#Digloo_Brew_IPA|Digloo Brew IPA]] resource to boost the Last Catch. However this boost can never be increased above the Max 8x. |
||
| − | |||
====RLC Usage Boost==== |
====RLC Usage Boost==== |
||
| Line 902: | Line 1,337: | ||
{| |
{| |
||
| − | !style="border-bottom:1px solid gray;"|RLC/FLC Used |
+ | ! style="border-bottom:1px solid gray;" |RLC/FLC Used |
| − | !style="border-bottom:1px solid gray;"|Catch Quest Fish |
+ | ! style="border-bottom:1px solid gray;" |Catch Quest Fish |
|- |
|- |
||
|0-2 banked |
|0-2 banked |
||
| Line 926: | Line 1,361: | ||
|15.8× boost |
|15.8× boost |
||
|- |
|- |
||
| − | | |
+ | |80 banked |
|16× boost |
|16× boost |
||
| + | |- |
||
| + | |... |
||
| + | |... |
||
| + | |- |
||
| + | |158 banked |
||
| + | |31.6x boost |
||
| + | |- |
||
| + | |159 banked |
||
| + | |31.8x boost |
||
| + | |- |
||
| + | |>=160 banked |
||
| + | |32x boost |
||
|} |
|} |
||
| − | |||
There are counters per active quest. Each quest's counter is displayed in the individual quest details page accessible from the [http://apps.facebook.com/fishwrangler/quest '''Main Quest Page''']. For example: |
There are counters per active quest. Each quest's counter is displayed in the individual quest details page accessible from the [http://apps.facebook.com/fishwrangler/quest '''Main Quest Page''']. For example: |
||
| − | |||
| − | |||
| − | |||
| − | |||
| − | |||
| − | |||
<code> |
<code> |
||
| − | + | Quest Started: on July 17th 2009 (5 days 10 hours 52 minutes 7 seconds ago) (quit?) |
|
</code> |
</code> |
||
| − | |||
| − | |||
| − | |||
| − | |||
| − | |||
| − | |||
| − | |||
| − | |||
| − | |||
<code> |
<code> |
||
| Line 958: | Line 1,389: | ||
| + | When the RLC boost applies, you'll see a message at the top of your screen that says for example: |
||
| + | <pre>Received 2.2x BOOST to catch the Emo! 2x from last quest catch ~1 day ago + 0.2x from 1 banked RLC.</pre> |
||
| + | ====Special Bonus - Quest Boost==== |
||
| − | When the RLC boost applies, you'll see a message at the top of your screen that says for example: |
||
| + | Special Bonus Quest Boosts can be found in [[Resources#Mystery_Tackle_Box|MTB]]'s. These Quest Boosts adds to your Quest Catch Boost total and they do '''stack''' with other Special Bonus Boosts. They will increase quest boost anywhere from 1.1x - 16x once activated (or auto-activated within 24 hrs). For example: |
||
| + | <blockquote>Woohoo! Started 12.6x Quest Boost Special Bonus that will last for 4 hours.</blockquote> |
||
| + | Odds of finding a Special Bonus Quest Boost might be increased if it is a very old unfinished quest. For more info on Special Bonus, please see FAQ [[FAQ#What_are_Special_Bonuses.3F_I_found_one_in_a_Treasure_Chest.|here]]. |
||
| − | <pre> |
||
| − | Received 2.2x BOOST to catch the Emo! 2x from last quest catch ~1 day ago + 0.2x from 1 banked RLC. |
||
| − | </pre> |
||
===I got a boost message for a fish not on my quest... ''and'' I'm not even using Red Love Chum!!=== |
===I got a boost message for a fish not on my quest... ''and'' I'm not even using Red Love Chum!!=== |
||
| Line 1,002: | Line 1,435: | ||
Trophies are rewarded to users who complete the entire dish quest set. |
Trophies are rewarded to users who complete the entire dish quest set. |
||
| − | ===I |
+ | ===I finished a Quest, but can't buy the Add-on=== |
| + | First, add-ons can only be purchased once your pole reaches a specific level, usually 50. Second, most later add-ons have a Quest requirement as well - for that reason, it's good to check your poles a) to make your poles are high enough to get to the next quest b) that your not leveling too slowly aka on pace to catch the next fish in line for a quest or getting multiple misses (Tournaments help you get ahead here) c) that your not leveling too quickly & you sacrifice gaining experience because your pole isn't ready to get upgraded yet. |
||
| − | You can only purchase addons once your pole reaches a Level 50 |
||
| + | Third, some add-ons require you to travel to a specific area first to be able to purchase a add-on. Fourth, some add-ons require a specific task to be fulfilled - examples include travel to a locked area which needs a Task Fish to unlock or completing Sigs experiments. |
||
===Why can't I start the next quest?=== |
===Why can't I start the next quest?=== |
||
| Line 1,009: | Line 1,443: | ||
===Why didn't I receive Liquid Gold when completing the final quest?=== |
===Why didn't I receive Liquid Gold when completing the final quest?=== |
||
| + | Note: Some Final Quests like the first two poles in Roperia, strangely only grant 1LG for the final quests, therefore acting as just difficult quests. There are no rewards for subsequent completions of these quests. So far, these are the only quests to do so. |
||
| − | '''Final Quests: (Quest #6 of #6, Quest #5 of #5, Quest #4 of #4)'''<br /> |
||
| + | |||
| + | Also, the difficult quests in areas after Alcatraz seem to not give any LG also. |
||
| + | |||
| + | '''Final Quests: (Quest #10 of 1o, #6 of 6, Quest #5 of 5, Quest #4 of 4)'''<br /> |
||
Upon first completion of Final Quests the Ancient Mariner rewards 2 Liquid Gold, and only 1 Liquid Gold for each successive completion. |
Upon first completion of Final Quests the Ancient Mariner rewards 2 Liquid Gold, and only 1 Liquid Gold for each successive completion. |
||
| − | '''Difficult Quests: (Quest #5 of |
+ | '''Difficult Quests: (Quest #5 of 6) or before the final'''<br /> |
Upon first completion of Difficult Quests the Ancient Mariner rewards 1 Liquid Gold, and NO Liquid Gold for each successive completion. |
Upon first completion of Difficult Quests the Ancient Mariner rewards 1 Liquid Gold, and NO Liquid Gold for each successive completion. |
||
| − | '''Bonus Quests: (Quest #7 of |
+ | '''Bonus Quests: (Quest #7 of 6)'''<br /> |
Upon first completion of Bonus Quests the Ancient Mariner rewards 3 Liquid Gold, and 2 Liquid Gold for each successive completion. |
Upon first completion of Bonus Quests the Ancient Mariner rewards 3 Liquid Gold, and 2 Liquid Gold for each successive completion. |
||
| + | |||
| + | '''Super Bonus Quests: (Quest #20 of #10)'''<br /> |
||
| + | Due to the difficulty & sheer number of fish in Super Bonus Quests, the Ancient Mariner delivers various high rewards usually 70-80 FLC, sometimes as high as 3 Liquid Gold. Other than FLC, which is awarded only on 1st completion of SBQ, rest of these values remain the same as few decide to attempt these subsequent times, as most use more love chum or resources than the rewards given. |
||
===Can I start a new quest before finishing an old one?=== |
===Can I start a new quest before finishing an old one?=== |
||
| Line 1,028: | Line 1,469: | ||
Note that as Player 1 started the quest, if Player 1 quits the current quest then the quest is aborted for ''both'' players. Any catches made by player 2 are not carried forward to a solo quest for Player 2. |
Note that as Player 1 started the quest, if Player 1 quits the current quest then the quest is aborted for ''both'' players. Any catches made by player 2 are not carried forward to a solo quest for Player 2. |
||
| − | === |
+ | ===Can a friend join a quest that I have already started? === |
Yes, if you have started a quest you can still invite friends to complete the quest with you even after you have started it. All of your current catches will still be accounted for but you will get the 1.5x multiplier once the friend accepts the invitation. |
Yes, if you have started a quest you can still invite friends to complete the quest with you even after you have started it. All of your current catches will still be accounted for but you will get the 1.5x multiplier once the friend accepts the invitation. |
||
| − | === |
+ | <s>===I see the message "Wrong Pole" under my quest === |
| − | If you see the “Wrong Pole” under your quest, you'll be given a list of your other inactive quests that you can activate, based on the town and pole you |
+ | If you see the “Wrong Pole” under your quest, you'll be given a list of your other inactive quests that you can activate, based on the town and pole you ha</s>[[Category:Quests]]<s>ve equipped. |
| + | </s> |
||
| − | [[Category:Quests]] |
||
Revision as of 09:38, 18 September 2019
General Quest Info
The base storyline is the same whether you're in Farovia or Roperia.
Farovia
Complete a quest either individually or with a friend. When you complete the catch requirements for a quest, go back to respective Quest area location to drop them off for your dish.
There are currently 3 locations to turn in quests for Farovia. The Sand - Bar and Grill! in WaterPort for most Quests. The Chataeu D'Amour in Lover's Lake for all Reelistic pole quests for Big Love Islands. And Farovian Air and Space Team in Fishertonville for all Dirigible / Mission Recovery pole quests. But you can also turn in any of the quests at any of the quest turn-in locations, not only the corresponding ones, it will still be accepted.

The Sand - Bar and Grill
Earl's lovely wife BetsyLou recently inherited a family restaurant and she needs help in preparing dishes for her restaurant, The Sand - Bar and Grill!, located in WaterPort
BetsyLou inherited this restaurant from her ex-husband Gumbo Gary who passed away in a tragic shark wrangling accident last week. BetsyLou is in dire need of help creating some new dishes for her new inheritance and wranglers can help in completing quests. Each quest you complete is another dish that's served at this lovely new place in WaterPort.
Each fishing pole has an assortment of signature dishes that require particular fresh fish from the local waters. Completing the quests not only completes the signature dish, but also unlocks pole addons allowing wranglers to catch new breeds of fish and hence more signature dishes.
Complete a quest either individually or with a friend. When you complete the catch requirements for a quest, go back to The Sand - Bar and Gill! to drop them off for your dish.

The Chataeu D'Amour
Wranglers turn in all Big Love Island quests for the Reelistic pole at The Chataeu D'Amour in Lover's Lake instead of traveling to the distant The Sand - Bar and Grill restaurant in WaterPort.
Offering 'fine farovian dining' run by Chef Wolfie, The Chataeu D'Amour is a little bit American West, a little bit French, this fancy hotel is built on a rise between the river and the lake. Newlyweds love the luxurious amenities and gorgeous views. Bonjour, pardner!
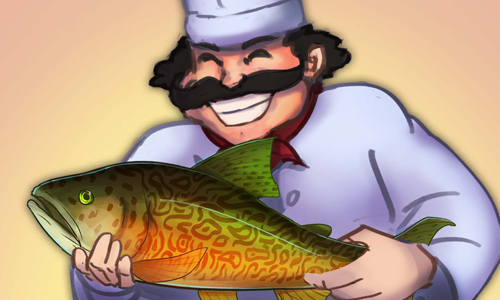
Chef Wolfie moved from Southern France to take over the hotel in Lover's Lake and needs help cooking some dishes at his place: Chataeu D'Amour!
Farovian Air and Space Team - Fishertonville Hangar
The FAST (Farovian Air and Space Team) as it is known as, is located at an old unused hangar within Fishertonville where wranglers will find a fishing shop that stocks all the poles and flying chum they'll need for their fishing adventure across the skies. It is also where wranglers turn in Dirigible / Mission Recovery pole quests at Farovian Air and Space Team in Fishertonville.

Jenny (Deckhand Dex's cousin) is the chapter president of the Farovian Air and Space Team, based out of Fishertonville. She needs help catching the flying fish of Monsoon Lagoon! When you complete the catch requirements for a quest, come back here to drop them off for your dish.
Roperia
Complete a quest either individually or with a friend. When you complete the catch requirements for a quest, go back to respective Quest area location to drop them off for your dish.
There are currently 2 locations to turn in quests for Roperia. The Wave Bar and Grill in Santa Francesca for all Roperian quests except for Icelantica Backside pole quests. And RUSSOQ Headquarters in Glacier Shack for all Icelantica Backside pole quests.

The Wave Bar and Grill
Frank's wife RubyMae recently inherited a family restaurant in Santa Francesca and needs help cooking some dishes at her place: The Wave - Bar and Grill!
Each fishing pole has an assortment of signature dishes that require particular fresh fish from the local waters. Completing the quests not only completes the signature dish, but also unlocks pole addons allowing wranglers to catch new breeds of fish and hence more signature dishes.
Complete a quest either individually or with a friend. When you complete the catch requirements for a quest, go back to The Wave - Bar and Gill! to drop them off for your dish.
RUSSOQ Headquarters
Wranglers turn in all Cold Fusion and Holy Hybrid pole quests at RUSSOQ Headquarters in Glacier Shack.
Needs info.
The Quests
There are a set of four to six quests for each pole. Each 'dish' varies in difficulty - the difficulty hints at the typical number of casts a wrangler may expect to make in order to complete that dish.
Completing some quests unlock an addon for that pole, which you can obtain once completing the quest and maxing out the pole. Each addon unlocks another 10 levels to add to your pole, and allows you to begin catching the Augmented Fish (there are at least four fish per pole at levels 57, 64, 73 and 80 - some poles may introduce more fish).
The final quest does not unlock anything, but wranglers completing the final dish are awarded the rare Liquid Gold attractant by the Ancient Mariner as a reward for their dedication to the task. You are also rewarded a Trophy Dish prize for completing that poles entire quest set.
Most Island areas will also have a SBQ (Super Bonus Quests) which usually require using all the poles for those Island areas and require having completed their respective poles entire Quest Set. For example WaterPort SBQ requires having completed all Oak Branch, Broken Standard and Fancy Rifle poles quest set before unlocking, plus the fish catch requirements include fish for all poles. Once unlocked, in order to start a SBQ requires the use of gold and resources. Clicking to start a SBQ will prompt advising what all gold and resources will be used to start, and you must click confirm to actually start it if you have all the necessary amounts. Completing a SBQ rewards Free Love Chum and various other bonuses, such as Liquid Gold, MTB, MTB, Deckhand Voucher, Red Shark, and/or Tarpit Stout. If that SBQ rewards Liquid Gold, upon completing it for the first time usually rewards either 2 or 3 LG. Any additional times completed will give 1 less. Please see the quest section FAQ LG below for more info on LG rewards.
- For more details on this topic, see List of SBQ. or in-game SBQ List
Each pole's menu is listed below. Tips to complete each quest are provided on every dish.
(Note: Thanksgiving Bonus quest will appear in Roperia section, as you need those poles first before starting. An add to Broken Standard unbalances the Farovia section rows.)
Farovia Quests
- = Bonus Quest
- = SBQ


|
|
| ||||||||||||||||||||||||||||||||||||||


|
|
|
| ||||||||||||||||||||||||||||||


Roperia Quests
- = Bonus Quest
- = SBQ
|
|
|
|


|
|
|
|


|
|
| ||||||||||||||||||||||||||||||||


|
|
|
|


|
|
| ||||||||||||||||||||||||||||||||||||
|
|
| ||||||||||||||||||||||||||||||||||||


General Tips
A detailed guide to each quest is provided on each page. Some general tips that apply throughout are provided below.
Skills
Before starting on a pole's quests - please make sure to have the advised skill already learned for those quests as some fish in each quest may require you having certain skills in order to be caught.
This list shows the skills required to complete each pole's set of quests:
- Oak Branch Quests - The Art of Night Fishing and Timing
- Broken Standard Quests - The Art of Night Fishing and Timing
- Fancy Rifle-pole Quests - Habitats of Large Fish
- Excali-pole Quests - The Art of Night Fishing and Timing
- Necro-pole Quests - Habitats of Large Fish
- Steam Powered Hydro-pole Quests - Mastering Shark Wrangling
- Cubey Incinerator Quests - Mastering Shark Wrangling
- Sonar Pulverizer Quests - The Secrets of Farovia
- Pneumatic Spear Quests - Scuba Fishing License
- Holy Liberator Quests - Sub-Zero Survival Training
- Evil Obliterator Quests - Sub-Zero Survival Training
- Algaenite Quests - Sub-Zero Survival Training
- Planktonite Quests - Sub-Zero Survival Training
- Royal Rescuer Quests - Truth of Piracy and Rescue
- Pyratic Plunder Quests - Truth of Piracy and Rescue
- Alcatraz Quests - Monster Wrangling
- Nail Fly Quests - Monster Wrangling
- Palm Spear Quests - Monster Wrangling
- Kelp Net Quests - Monster Wrangling
- Sling Spear Quests - Monster Wrangling
- Torpedo Spear Quests - Monster Wrangling
- Electro Spear Quests - Monster Wrangling
- Guardian Grabber Quests - Monster Wrangling
- Danger Destroyer Quests - Monster Wrangling
- Crapolé Quests - Filtration 101
- Floral Standard Quests - Filtration 101
- Landscaper Quests - Filtration 101
- Lightning Rod Quests - Filtration 101
- Revelation Rod Quests - Art of Mysticism
- Coal Powered Thermo-pole Quests - Intro to Reef Cleaning
- Shredder Quests - Intro to Reef Cleaning
- Nueron Transducer Quests - Mastering Nuclear Physics
- Legionnaires Lance Quests - Mythology of Roperia
- Folsom Quests - Basic Marksmanship
- Outback Quests - Clockwise Navigation
- Survivalist Quests - Sacrifice Survival
- Poacherist Quests - Sacrifice Survival
- Great Equalizer Quests - Cartography and Exploration
- Kolenya Quests - Cartography and Exploration
- Candy Cane Quests - Handling Rejection
- Medical Mangler Quests - Handling Rejection
Using Attractants
The optimal use of attractants will depend on how much you use Red Love Chum or Free Love Chum.
- If you are a heavy RLC user, then use any available attractants as soon as possible as this eliminate those fish from the list and hence will maximise the RLC Boost on non attractant fish.
- If you do not use RLC, then it may be better to save any attractants to finish off the quest. For example the Steam Powered Hydro-pole Railway Reuben Quest requires 8 Joan of Farovia Fish and 4 Striped Diablo Fish. It is more than likely that the majority of Joans will be caught (if not all of them) by the time the Striped Diablos are caught, thus saving you up to 8 attractants depending on how many Joans were remaining once all the other fish were caught.
When to Purchase Addons
During the progression of the quests on each pole, some believe that it is advisable to hold off on purchasing addons, instead of purchasing as soon as they are available. For more information on suggested addon-quest purchasing strategies read the details quest pages referenced on this page.
Also, if you have not started fishing in Icelantica and are starting quests, it is suggested you only complete the first couple of quests of the poles and hold off on the remainder until after you've done so. One reason is that the addons required for later quests do end up costing a lot of gold compared to what you earn fishing in the Farovian Islands and once you get past certain areas in Icelantica, gold is much more easily earned.
Quest Durations
A guide to the number of casts required to complete each quest is provided in the detailed description. These are only guides as experienced by wranglers and not predetermined figures - you may take more or less casts than quoted.
Note if you cast less than 30 times per day, understand that any quest above the first couple for each pole could take a month or longer for you to complete.
FAQ
How Quests Work
Only one quest can be active at a time. Completion of preceding quests will unlock additional quests.
Each quest requires a particular pole, so you must fish with this pole in order to have the fish count towards the dish.
You can catch required quest fish via Crew Trips, deckhand trips and individual trips. Please note that Captain Trips, Tournament casts and Night Fishing trips do NOT count towards quests.
There are no time restrictions. Quests are timed for leaderboard purposes only. The clock begins when the quest starts, and ends when the dish is dropped off at BetsyLou's 'Sand Bar & Grill' in WaterPort or RubyMae's 'Wave Bar & Grill' in Santa Francesca. You can compete in the same quest multiple times.
Quests can be completed individually or with a friend. You can not invite someone who is already actively completing the same quest. If you invite a friend to a quest, the invitation remains active for 24 hours. You will be unable to invite another friend to your quest until the invitation expires or your friend rejects the invite. If competing with a friend, dish requirements will be multiplied by 1.5 (rounded down).
Quest Boosts
Using Red Love Chum or Free Love Chum will give you an increased chance of catching the next required quest fish based on two factors; time since the last quest catch and number of RLC/FLC used since the last quest catch. The two measures are cumulative and so will be added together to give you a 'boost' for your next quest target. This 'boost' also applies to Crew Trips, however you won't see the header message shown below.
Note that the boost does not guarantee catching a quest fish, merely improves your chances of catching one.
Last Catch Boost
The longer you go without a quest catch, the better chance you have of making a quest catch! The Last Catch boost resets after making a quest catch.
| # of Days | Catch Quest Fish |
|---|---|
| < 1 day | 1.5× boost (always) |
| 1 day | 2× boost |
| 2 days | 3× boost |
| 3 days | 4× boost |
| 4 days | 5× boost |
| 5 days | 6× boost |
| 6 days | 7× boost |
| >6 days | 8× boost |
NOTE: While in Roperia, wranglers can use the Digloo Brew IPA resource to boost the Last Catch. However this boost can never be increased above the Max 8x.
RLC Usage Boost
You "bank" RLC by making non-quest catches, which in turn increase your chances of making a quest catch according to the table below. The bank resets after making quest catch with RLC/FLC
| RLC/FLC Used | Catch Quest Fish |
|---|---|
| 0-2 banked | 0.2× boost |
| 3 banked | 0.6× boost |
| 4 banked | 0.8× boost |
| 5 banked | 1× boost |
| ... | ... |
| 78 banked | 15.6× boost |
| 79 banked | 15.8× boost |
| 80 banked | 16× boost |
| ... | ... |
| 158 banked | 31.6x boost |
| 159 banked | 31.8x boost |
| >=160 banked | 32x boost |
There are counters per active quest. Each quest's counter is displayed in the individual quest details page accessible from the Main Quest Page. For example:
Quest Started: on July 17th 2009 (5 days 10 hours 52 minutes 7 seconds ago) (quit?)
Diego: Last Quest catch ~23 hours ago 2 banked RLC
When the RLC boost applies, you'll see a message at the top of your screen that says for example:
Received 2.2x BOOST to catch the Emo! 2x from last quest catch ~1 day ago + 0.2x from 1 banked RLC.
Special Bonus - Quest Boost
Special Bonus Quest Boosts can be found in MTB's. These Quest Boosts adds to your Quest Catch Boost total and they do stack with other Special Bonus Boosts. They will increase quest boost anywhere from 1.1x - 16x once activated (or auto-activated within 24 hrs). For example:
Woohoo! Started 12.6x Quest Boost Special Bonus that will last for 4 hours.
Odds of finding a Special Bonus Quest Boost might be increased if it is a very old unfinished quest. For more info on Special Bonus, please see FAQ here.
I got a boost message for a fish not on my quest... and I'm not even using Red Love Chum!!
Due to an outstanding glitch, on random casts it is possible to be shown the boost message for a crew mate you have just taken on a Crew Trip who is using Red Love Chum for their current quest.
Don't worry, this has not interfered with the chance for catching your own quest fish, more than the message which is normally hidden has found a way into your view. Think of it as no more than a Thank you message from your crew mate that you are helping them on their current quest!
I am using Red Love Chum/Free Love Chum but I don't get the boost message
The Red Love Chum boost only applies for the next fish in the list. If it is not possible to catch the next fish in the list (for example, if you do not have the requisite skill or pole level, or if you are on an island where the next fish does not reside), then the RLC boost will not activate.
Where can I fish?
You can fish at any location, but you do need to use the correct pole in order for that catch to count. Check out the Fish Location Chart to see what locations make good spots for your current quest.
Why do Captain Trips, Night Fishing catches and Tournament casts not count towards Quests?
On a captain trip, you are showing your apprentice the art of wrangling and as the captain and apprentice share the fish (in terms of points), it can't be returned to BetsyLou as part of the dish hence why Captain Trips are not counted. (The real reason, of course, is that some people have many apprentices and these people would have a major advantage over those that don't. Plus, it would encourage cheating with users creating multiple accounts just to reap the benefits of multiple Captain Trips.)
Tournament casts are 'catch-and-release' and as such these fish also cannot be returned to BetsyLou as part of the dish and hence are also excluded from quests. (Though the real reason is that this would discriminate against certain classes. Not all wrangler classes will utilize a quest pole in the appropriate location so those that do have a "15 casts in only 5 minutes" advantage over those that don't. Since the quests are timed with a fastest finisher leaderboard this could give some players a major advantage over others.)
Fish caught on a Night Fishing trip are pooled together at the end of the excursion and the points and gold are split between the team. In the same way that the shared Captain Trips cannot be returned to BetsyLou, the same applies to Night Fishing catches. (Although there are a few wranglers that don't go on Night Fishing trips who would be at a disadvantage if such catches were allowed, the real reason is one of practicality; the current night fishing system has various technical limitations as it calculates/saves thousands of fish catches per second. Adding in additional checks for quest catches would simply add additional burden to an already over-worked area of the code.)
Excluding these casts therefore removes some of the biased elements of the game and puts everyone on a level playing field.
My catch didn't count!
A common complaint by frustrated wranglers, however most situations can usually be explained legitimately:
- Make sure you have the correct pole activated. Participating in tournaments could leave wranglers fishing for quest fish with the wrong pole without realising. The quest box will inform you if the currently active pole is the wrong one for the currently active quest and give you the option to activate the correct pole from there. For example; "Wrong pole! Activate Fancy Rifle-pole?"
- For quests requiring a Miny Fish or a Miss Miny Fish, many wranglers have confused the two assuming they have a quest catch when its their counterpart they have just caught. Double check if the requirements are the breed of Miny fish you have just caught.
- Due to a current glitch in the Captain's code, catching a Loafy Fish on a Captain Trip won't be parsed normally and it will described in the skippers log as a normal catch. Captain Trips, of course, are not counted towards Quest catches and hence why that catch will not count towards reducing the catch requirements. This can be confirmed as your apprentice will receive a generic Captains Trip message with no fish description with the same timestamp as the timestamp of the Loafy fish catch. Interestingly this glitch has existed since the Captains Trip functionality was introduced, but its only with the advent of Quests that wranglers are noticing this quirk.
- The same glitch occurs when catching schools of Cubeys with the Cubey Incinerator. On a Captain Trip, this will look like a normal cast, but that is just a description error. Any schools not counted for the first Cubey Incinerator Quest are likely to be Captain Trips and not a normal cast. An additional benefit due to this bug is that catching the Cubeys with a captain trip will also cool down your pole.
Finishing a Quest
After catching all the fish requirements, you must visit the Sand Bar & Grill by traveling to WaterPort or the Wave Bar & Grill in Santa Francesca. BetsyLou or RubyMae will reward each wrangler with the dish. Only catches on an active quest can be exchanged with BetsyLou.
Trophies are rewarded to users who complete the entire dish quest set.
I finished a Quest, but can't buy the Add-on
First, add-ons can only be purchased once your pole reaches a specific level, usually 50. Second, most later add-ons have a Quest requirement as well - for that reason, it's good to check your poles a) to make your poles are high enough to get to the next quest  b) that your not leveling too slowly aka on pace to catch the next fish in line for a quest or getting multiple misses (Tournaments help you get ahead here) c) that your not leveling too quickly & you sacrifice gaining experience because your pole isn't ready to get upgraded yet.
Third, some add-ons require you to travel to a specific area first to be able to purchase a add-on. Fourth, some add-ons require a specific task to be fulfilled - examples include travel to a locked area which needs a Task Fish to unlock or completing Sigs experiments.
Why can't I start the next quest?
Each quest has a pole level requirement. You will not be able to start the quest unless you meet this requirement.
Why didn't I receive Liquid Gold when completing the final quest?
Note: Some Final Quests like the first two poles in Roperia, strangely only grant 1LG for the final quests, therefore acting as just difficult quests. There are no rewards for subsequent completions of these quests. So far, these are the only quests to do so.
Also, the difficult quests in areas after Alcatraz seem to not give any LG also.
Final Quests: (Quest #10 of 1o, #6 of 6, Quest #5 of 5, Quest #4 of 4)
Upon first completion of Final Quests the Ancient Mariner rewards 2 Liquid Gold, and only 1 Liquid Gold for each successive completion.
Difficult Quests: (Quest #5 of 6) or before the final
Upon first completion of Difficult Quests the Ancient Mariner rewards 1 Liquid Gold, and NO Liquid Gold for each successive completion.
Bonus Quests: (Quest #7 of 6)
Upon first completion of Bonus Quests the Ancient Mariner rewards 3 Liquid Gold, and 2 Liquid Gold for each successive completion.
Super Bonus Quests: (Quest #20 of #10)
Due to the difficulty & sheer number of fish in Super Bonus Quests, the Ancient Mariner delivers various high rewards usually 70-80 FLC, sometimes as high as 3 Liquid Gold. Other than FLC, which is awarded only on 1st completion of SBQ, rest of these values remain the same as few decide to attempt these subsequent times, as most use more love chum or resources than the rewards given.
Can I start a new quest before finishing an old one?
It is possible to start a new quest before finishing the current quest, but only one quest will be active at any one point in time - meaning that any catches made will only go towards the currently active quest - even if you caught a fish on the correct pole.
Simply start a new quest and the existing quest will become inactive. It is possible to have multiple inactive quests. You can change which quest is active by making the desired quest active from your Quest History list. Note that the timer will still be ticking away on inactive quests.
How Do I Quit/Leave a Quest?
After creating a quest, the quest leader (Player 1) must wait two hours before deleting the quest. The invited user (Player 2) can leave the quest at any point; however, this action will remove any fish contributions Player 2 accumulated towards the quest. Player 1 must complete the quest individually, and the dish requirements will be reduced (from 1.5× to 1.0×).
Note that as Player 1 started the quest, if Player 1 quits the current quest then the quest is aborted for both players. Any catches made by player 2 are not carried forward to a solo quest for Player 2.
Can a friend join a quest that I have already started?
Yes, if you have started a quest you can still invite friends to complete the quest with you even after you have started it. All of your current catches will still be accounted for but you will get the 1.5x multiplier once the friend accepts the invitation.
===I see the message "Wrong Pole" under my quest ===
If you see the “Wrong Pole” under your quest, you'll be given a list of your other inactive quests that you can activate, based on the town and pole you have equipped.